best season to paint exterior of house

Video Playback Not Supported Painting the outside of your house is best done in the fall or spring when temperatures are moderate, and the weather isn’t too hot or too cold. The best temperature range for painting outdoors with latex paint is from 50° to 85° F. Painting during hot weather can cause latex paint to dry too fast, resulting in brush marks and clumps of paint on the paintbrush. Painting when it’s too cold can cause the paint to not adhere well to the surface, resulting in cracking and peeling. Volatile organic compounds (VOCs) are chemicals released into the air by some paints when they dry. Breathing VOCs isn’t good for your health or the environment, so be sure to buy low VOC or no VOC paint when painting inside or outside your home. Watch this video to find out more. Temperature Range for Painting Your House (article) Painting Outside in Cold Weather (video) Preparing the Outside of Your Home for Painting (video) Painting the Exterior of Your House (video)

How to Paint Anything Outside (article) Danny Lipford: Besides raking leaves, one of the other things that’ll be getting done around the neighborhood during the fall is painting. That’s because the best time to apply latex paint is when the outside temperature is moderate. You know if it’s too hot, it dries too quickly, and it leaves some ugly brush marks on the surface that you’re painting.
best exterior paint color for small houseAnd clumps of paint will get in the brush, making it real hard to do a quality job.
exterior home decor colorsNow if it’s too cold, it just won’t bond as well to the surface where you’re applying it.
best paint for outdoor plastic furniture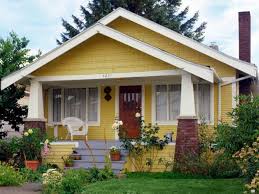
So now is the time to get it done. But while you’re doing a little painting, think about painting green. Not the color, but “green” as in with the environment in mind. Now you’ll see that most water based, latex paints contain VOCs or volatile organic compounds. As the paint dries, it gives up these chemicals, which are released into the air for about six months after you’ve applied the paint. Inside your home that means a strong odor and poor air quality for you. But outside it means ozone pollution and the release of smog forming chemicals into the atmosphere. None of that stuff is good stuff, so many paint manufacturers have begun reducing the level of VOCs in their products to address this concern. Now it’s possible to find paints, like this one, which is actually formulated to give off about nine times fewer VOCs by weight. So check the label before you start, and get that painting done before the cold sets in. Videos You May Like Painting in Cold Weather

Ideal Temperature for Painting Outdoors Temperature Range for Painting Photo By: Ryan McVay Photo By: Dennis Oblander Photo By: Linda Macpherson Photo By: Laurey W. Glenn Plan ahead when painting. The time of year is key, so understand your local weather patterns. Select a dry time of year when there is little rain and lower humidity. Paint needs time to dry and will not adhere to surfaces that are not dry. Better quality paint means you will paint fewer times over the years, and you'll get better coverage when you do paint. Paint technology has improved dramatically in the past few years, with colors guaranteed to last longer than ever before. You may be tempted to skimp on paint to save money up front with a cheaper brand, but you're bound to have trouble and eventually pay more in the long run. Paint won't adhere very well to dirty or rough surfaces, so be sure to clean the siding and trim thoroughly, allow to dry, and sand. Be sure to sand (or scrape as needed) any peeling paint to create a solid surface for the paint to adhere.

Rotten wood and siding material are nearly worthless to paint, as they will do nothing but to continue to deteriorate. You have a couple of options. Replace the siding or wood trim with new components, or in the case of small areas, use a wood hardener and match with an exterior filler product, such as a wood filler. Be sure to prep and sand either one prior to painting. The rule of thumb has always been to apply a good coat of primer, sand, then apply your color coats. This is still a good rule to follow, but new paint technologies have combined primer and paint into one product, which manufacturers assert will cut down on the number of coats you will have to apply. This newer paint is more expensive, but may be comparable to the purchase of separate primer and paint. Look at reviews of these newer paints, particular from folks that have used it in your area. Mixing multiple cans of the same color of paint into a larger container, such as a five-gallon bucket, will help ensure a uniform color is applied to your home's exterior.

This step, called boxing the paint, is a method the pros follow. This step is important if, for example, you initially bought a gallon or two of paint less than you needed and then picked up the extra gallons at a later time. Starting at the top and working your way down while painting helps control streaks, as you will be working with gravity rather than against it. Drips are inevitable, but this method will allow you to feather out mishaps in the direction you are working. Properly close your paint containers with their lids after you finish for the day to keep the paint from drying out. Use a rubber mallet to lightly hammer the lid shut. You can also add a plastic wrap film over the opening to ensure a tight seal. Painted porches (particularly steps) and other painted floors can become a bit too slick with a coat of paint alone, so add a little bit of fine sand to the paint to add traction. You can use play sand or additives that manufacturers have begun producing to provide this extra texture.