what paint to use on exterior tiles
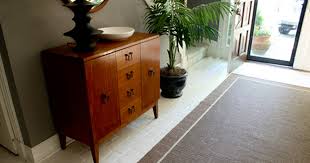
If your outdoor ceramic tiles could benefit from a little updating, freshening them up with a new coat of paint helps breathe new life into your curb appeal without emptying your wallet. Painting outdoor tiles allows you to improve the look of your exterior space without the inconvenience of messy demolition projects or frequent trips to the hardware store. When you freshen up the paint on the exterior of your home, take time to update any worn and dated outdoor ceramic tile you have, as well. Clean your outdoor tile thoroughly to remove any buildup of dirt or grime by mixing oxygen-bleach with water according to package instructions. Apply the solution to both tile and grout. The oxygen in the bleach will clean deeply, removing the dirt buildup. Allow the oxygen-bleach to penetrate for 10 minutes. Scrub the tile with a scrub brush, and the grout lines with a grout brush. The specialized grout brush will remove the dirt without damaging or removing any delicate grout. Allow the floor and grout to dry for at least 48 hours before painting, as grout needs to be completely dry.
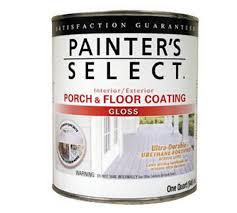
Paint over the ceramic tile in a paint color of your choice. Choose a water-based paint with urethane resin to prevent paint from peeling down the road. Roll the paint onto the tiles using a low-nap paint roller, so that it rolls on smooth with a minimum amount of texture. Hang a tarp around the area to keep dust and debris from blowing onto the fresh paint. If you are painting a patio, hang the tarps off of the roof to create a room-like area until the paint is dry. Allow the paint to sit for 48 to 72 hours to ensure it is completely dry and hardened before removing the tarp. Add interest to your outdoor tile project by using a template to stencil a design on individual tiles that are sprinkled here and there throughout your patio. Always ensure you have proper ventilation when using this type of paint. Sherwin-Williams: Resuscitate Old Tile With a Coat of Paint You May Also Like When you are ready to remodel the bathroom, you do not have to remove the old tile--if you are looking to save...

Believe it or not, you don't have to rip out that tile to get a fresh new look and color in your... If you don't like the color of your tile, removing it may not be an option; replacing it with new tile or... Homeownership can be a bewitching blend of broadening your basic talents and knowing your limitations. Such may be the case if you're... Over the course of time, tile can begin to get worn out in its appearance. Whether it's a buildup of dirt and... Painting outdoor ceramic tile can give the exterior of your home a whole new look. If you are the creative type, why... Terracotta tiles provide an old-world feel for your home. Many homeowners love the look of the reddish, clay-based ceramic. Add an artistic touch to a variety of crafts projects with hand-painted tiles. Even if you are not an accomplished artist, you... Red roof tiles are commonly found on Spanish-style home designs. When choosing an exterior paint color, homeowners must take several things into...
22 DIY Ways to Update Your Home on a Small Budget How to Paint on Terracotta Tiles
typical exterior house painting costs How to Paint Over Existing Tile
living room decorating help How to Hand Paint Ceramic Tiles How to Seal Outdoor Tile How to Repaint Pool Tiles How to Paint a Garage Exterior With a Paint SprayerDecorating and adding accessories can only do so much when it comes to updating a room that has a particularly nasty color of ceramic tile. We all remember the harvest gold, avocado green, and burnt orange that adorned so many kitchens and bathrooms 30 years ago. For many, the prospect of removing and replacing this tile is not financially feasible, so painting it maybe the solution to your problem. It is true that paint does not like to stick to the slick, shiny surface of tile.

But with a little bit of extra preparation, you can paint your tile and create a durable surface that is much more visually appealing than the outdated look you may currently have. First, let's talk about what you can and cannot paint. Don't paint any tile surface that gets wet repeatedly. If you try to paint your shower surround or even your tub itself, you will be cleaning paint chips out of the bottom of your tub within a matter of weeks. It just won't stick. There are professional services available that will paint your ceramic appliances and fixtures. Things like your antique claw foot tub, your toilet, and shower stall can be painted with a highly specialized product that requires a good deal of skill to use. What we're talking about in this article is painting wall tile or countertops that see everyday use but won't get soaking wet all the time. As with most painting projects, preparation is the most important part. The goal is to create a surface that the paint will stick to.
Since we have already established that most paints will not stick directly to the slippery tile surface, we need to get rid of that shine. The first step is to clean the tile vigorously with a commercial tile cleaner. Make sure you use one with a mild abrasive. Not only will this remove all of the buildup from the tile and make it nice and clean, but the abrasives will begin to break down the shiny surface. At this time, also make sure that anything that might deteriorate underneath your paint job is addressed. Crumbling grout, mildew stains, and cracked tiles should all be taken care of now. You can't go back and address them after you paint unless you want to repaint the entire thing. Once you are confident that the surface is clean and free of damage, you need to get a little more aggressive about taking that slippery shine off of the tile. The best way to do this is with a handheld orbital sander. Use a 220-grit sandpaper. This will be course enough to remove the gloss, but still fine enough to prevent you from leaving any marks that may show later through your paint.

If you don't have an orbital sander, you can do it by hand—it will just take a little longer. After every surface that is going to be painted has been sanded, including the corners, use a cloth and make sure that all of the dust is thoroughly removed. Sanding is tedious and is generally not very much fun, but I can't overemphasize how important this step is. If you skip the sanding or only do it half-heartedly, the paint simply will not stick. Now that you have a freshly sanded surface that is dry and free of dust, you have the perfect foundation for a good paint job. By using a high quality and high adhesion primer, continue to build the base that your paint will be applied over. This is not the project where you want to skimp on paint costs. Don't buy the cheap primer—you need a strong bond in order for this to stick to the tile. Use an oil-based product, as you will be using an oil-based paint for the finished coats. Apply the primer using a brush to cut in the corners and then a short napped roller (1/8") to apply the primer to the flat surface.

Go slowly and make sure you don't leave any lines caused by paint squeezing out of the edge of the roller cover. These will show through later when you apply your finish coats. Allow the first coat of primer to dry for the amount of time recommended on the can, and then apply a second coat. Once the primer is dry, take a fresh sheet of 220 sandpaper and make a very light pass over the primed surface. You are not trying to remove the primer, you simply want to remove any small burrs that may have risen out of your roller cover and make sure that the surface is perfectly prepared to receive paint. Some people suggest that you can use latex paint for your top coat. However, you should probably use oil. It is messier, takes longer to apply and longer to dry, but when it dries it provides a very durable finish. Latex paint often dries with a fairly soft, rubbery feel. If you were to bump it with something hard, the chances that it could peel right off are pretty high. Use an oil-based semi-gloss or high gloss alkyd for your top coats.