what paint for exterior door frame

Few features of your home make an immediate visual impact like the exterior paint job. Superbly applied paint conveys your pride in your home and helps define its personality. You may be tempted to get straight to the painting, but diligent prep work is critical to a professional-looking finish. According to Dan Lawson of Medallion Paint, "Ninety-five percent of good painting is having a good surface." Before painting a new house with a stucco exterior, let the stucco cure for at least 28 days. Paint will not adhere properly to uncured stucco and may appear chalky or dusty. If you're in a hurry, here's a tip from Richard Luks, construction manager for RSR Custom Renovations and Additions: "Keep the stucco wet by spraying it with a hose. If it's washed daily, it can cure in a week to 10 days." If you are repainting an existing home, inspect the exterior walls and trim for chipping, peeling, mildew and other imperfections. Kill off mildew by applying a chlorine bleach solution with a garden sprayer.

Then pressure-clean the entire exterior to remove dirt and old paint that has come loose.
christmas tree decorating ideas gold and red Before you pick up a paint roller, grab a tube of caulk.
home decor ideas for shelvesIt's vital to seal any cracks, as well as the joints where one type of exterior material meets another.
christmas tree decorations woodThis includes: window frames, door frames, molding and fascia boards. If an old stucco surface has chips or pits, patch them with new stucco (and allow time to cure). Replace wood siding or fascia boards that show signs of rotting. Gently sand wood trim and doors to ensure an ideal surface for painting. To get the most out of your paint job, prime with a quality sealer.

"Sealer has high resin content," Dan explains. "That goes over old paint, locks everything in place and creates a good surface for the new paint to adhere to." If you are repainting walls that have become chalky or dusty, select a chalky wall sealer. Paint will not stick to a dusty surface. As for new construction, latex primer works well for vinyl and most wood siding. If you're working with stucco that is not fully cured, you can apply a hot stucco primer. This sidesteps the waiting period, allowing the surface to accept paint as soon as the primer dries. It's best, however, to let stucco cure for the recommended time period if possible. Check the label on your primer or sealer to determine how long to wait before you begin painting. A good exterior paint is 100 percent acrylic latex. The formula consists of three main components: - Pigments, which provide the color.- Binders, which hold the pigment to the wall.- Solvents, which make the paint spreadable. Today, most exterior paints are water-based.

As paint dries, the solvent evaporates, leaving behind only the pigments and binders. These are known as volume solids. Higher quality paints are generally higher in volume solids. They may also have better binders, which will hold the pigments in place longer. To determine the percentage of volume solids in a brand of paint, check the manufacturer's website or ask your local distributor for a Technical Data Sheet. In general, paints labeled "premium" or "super-premium" are likely to be higher in volume solids than budget brands. When it comes to color selection, there are so many choices that the decision can be overwhelming. If you're not sure where to start, spend some time driving around your neighborhood to see what appeals to you. Keep in mind that vibrant colors will fade sooner than more muted ones. Be sure to consider the stylistic elements of your home — choose a color that complements your roofing material and any brick or stone accents. If you're having trouble deciding between two shades, paint sample swaths on a section of your home's exterior.

Look at the result during different times of day to see which one you like best. Before getting your heart set on a certain color, check with your neighborhood association and local building department to make sure there are no restrictions on paint colors in your area. The ideal way to paint exterior walls is called spraying and back-rolling. This method requires two people. One uses a sprayer to quickly and evenly spread paint across the surface. The other person follows behind, running a roller over the paint that has just been sprayed on. This delivers an even finish, particularly on textured surfaces like stucco. "This offers the best of both worlds," Dan tells HGTV. "You get the speed of the sprayer and the evenness of the roller." To protect your windows, cover them with plastic before you begin spraying, or use a sprayer with a shield. If your budget allows, apply a second coat after the recommended dry time. Muted colors cover better than bright ones. For vibrant shades, you may require a second coat just to get the full color.
"Two coats are always going to give you a better result," Dan adds. "It evens everything out to put a better shell on your house. You'll get more life out of the paint job with a second coat." The last step is to paint the doors, fascia, molding, shutters and other decorative details. The best tools here are "a steady hand and a good brush," Richard says. You can save a little time by using 6-inch "hot dog" rollers to get the paint on quicker, particularly along the length of the fascia. But there are no short cuts to a professional finish — you have to put in the time to get the best results. Depending on your climate, a superb paint job with top-of-the-line materials can hold up for as long as 10 years.Probably the page you were searching for is missing. We apologise for any inconvenience.As you know, Mr. Money Mustache likes to spice up his long summer vacations with occasional carpentry projects. Because of the , I’ve made peace with the fact that I’m at my happiest when I get to accomplish something useful at least once every week or so.

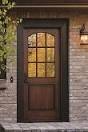
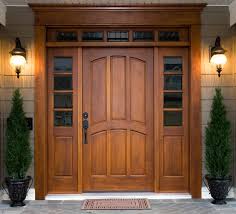
So this week, I installed a new set of french doors out to the back patio at my Mom’s house here in downtown Hamilton (that’s Grandma Money Mustache to you). There was already a set of circa-1992 doors in place, but one of them had partially rotted away due to repeated water and insect exposure. Plus, both doors tended to develop fog between their glass panes in winter. When you add in the fact that this area has a rainy climate with fairly cold snowy winters, we figured it would be quite a significant upgrade to pop in a set of new steel-clad glass doors with energy-star insulation rating and low-E/Argon-filled glass panes, solving all the problems in one go. When I got to her house last week, GMM had already clipped a Home Depot coupon offering 15% off of all exterior doors. So we decided to start our shopping there. We strategically chose a Home Depot location that was close to a branch of its biggest competitor – Lowe’s. Reviewing the selection of doors in HD, we found what we needed: a 6-foot-wide by 80″ high set of doors, with a left-hand inswing on the primary door.
Low-E glass, energy star, the whole deal. Price was $539 before discount. The only problem was that the sole unit in stock had obviously been bought and then returned by another customer. Packaging materials were gone, frame and sill were dirty, screen was missing. So we decided to activate Step One in the Hacking Home Depot plan: Step One: If possible, find a discountable product: Look around to find any one-off or returned product that has what you need, then ask a store employee what sort of discount they can offer on the scratch’n’dent unit. I found the department manager and with no negotiation at all, got $100 off of the door, and he agreed to throw in a replacement rolling screen unit from the same aisle, retail price $79. So together we slid the bulky 150-pound door unit off its shelf and onto our lumber cart. With the rest of the door now visible, I inspected it carefully for damage. Everything looked great (or at least patchable) until I noticed that the specialized bottom weatherstripping was missing from one of the door panels.

This was non-standard stuff and would create more than $100 of hassle to replace, so I decided to call off the deal. Normally at this point, I’d just place an order for a new-condition door with the millwork desk, but since I’m only in town for a few more days, and we had traveled over 10 miles in the construction van specifically to get an in-stock door, we decided to have another crack at finding something. Next stop: the competing Lowe’s just a mile down the road. Heading to the exterior doors department in Lowe’s, we found a much better scene. Similar doors at similar prices, but more of the “left hand inswings” in stock. But there was also this one door sitting all alone at the end of the line: As you can see from the picture, the whole top piece of that door’s jamb has come separated from the side piece. Plus the packaging material is gone, it’s dirty, and it looks like bad news in general. But it had an intriguing feature that really appealed to GMM – internal blinds which are sealed between the two glass panels, meaning no need to buy separate blinds, easier operation and no cleaning.

The door was also a better-known brand: Jeld-wen instead of Reliabuilt. I did a quick web search on my phone and learned that this particular model of door normally sells for $629. I was now ready to find a store employee and make my pitch. Step 2: Play the stores against each other: Not everyone knows this, but Lowe’s and Home Depot have a policy of always honoring each other’s coupons and matching prices. Got a 15% off coupon for HD? It will work just as well at Lowe’s. Found a lower price on an identical item at Lowe’s? Take a picture and show it to HD, and see what they do. So I showed my 15% coupon for Home Depot to the department manager, and said this: “Would you be willing to sell us this damaged door on the end for $529, minus the 15% discount that HD is offering, with another $100 taken off for the damage?”. I made sure to ask the question in a buddy-buddy way rather than an entitled-customer way, adding that I would fully understand if he didn’t feel it was an appropriate deal for him.

Without blinking, the guy said he would be happy to do so (I find that this happens almost every time, since these stores often have a hard time unloading damaged goods). From there, things got even better. We started sliding the door out onto the cart. The thing about French doors is that they are heavy glass and steel units attached to a thin and flimsy wooden frame. Without the packaging materials, everything flops all over the place in a very frightening way. Although GMM and I were cheerful and patient with the situation, the department manager became very apologetic upon seeing how “broken” the whole thing looked as we eased it on to the cart, and he offered additional discounts. In the end, he priced the door at $260, less than half of the regular price! On the way out, I happened to notice that both stores were offering “Professional Installation” of French doors for $650 – with a t0-be-determined additional surcharge for unusual situations such as older houses and brick construction.
I mentally added that amount to our savings for the day. The funny part of all of this was that the door system was in perfect condition from my perspective. When installing big doors like this, I always start by unpackaging them and removing both doors from their hinges anyway, allowing precise leveling and screwing of the frame without the heavy doors constantly swinging around and getting in the way. So we rolled it out to the parking lot, took off the doors, pried apart the four pieces of wood that form the jamb, and laid everything into the back of my van for easy transportation. This provided additional time savings, since it normally takes some serious work (and two strong, tall people) to load a double door onto a roof rack and secure it for a long drive and then unload it at the other end. To make a long story short, I screwed the door frame together from the comfort of the back patio (10 minutes), painstakingly removed the old door system from the rough antique brick opening (1.5 hours), installed the new frame and doors and shimmed, screwed and sealed them in with spray-in foam insulation (1 hour).

Then I had to create customized uneven pieces of trim both inside and out to compensate for the fact that the old brick wall was crooked in both dimensions, while doors must always be installed absolutely straight, square, and level in all directions to allow proper operation (2 hours). Hmm, it looks like this post is morphing from a “shopping and negotiation tips” article into a “do-it-yourself-tips” article, so let’s finish it off with a few pictures of the actual door replacement process: How to replace a patio door in a brick wall: Step 1: carefully review your old door – measure the brick opening, the size of the doors, etc. Take off the interior trim and measure the frame in there. Buy a door to match the size, leaving at least 1/2″ of space on each side (most patio door sets are designed to fit within a 72″ x 80″ rough opening). Step 2: Once you have the new door sitting there ready to install, remove the old one: take old doors off their hinges, remove any remaining trim, pull out any nails, screws, and shims holding the door into its opening, and if necessary, use a saw (sawzall recommended) to cut the old jamb in several places, making it easy to pry out.

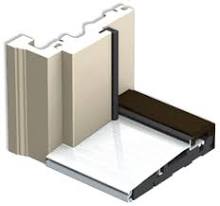
Step 3: With the new doors removed from their hinges, place the new door into the opening. For 2×4 wood construction walls, put the jamb flush with the interior drywall. For much thicker brick walls, use your imagination to decide how deeply to recess the door – you’ll be making your own trim to fill the gap anyway. Shim the bottom corners to make it perfectly level. Lock in the bottom corner with a nail or screw. Work your way up, making the hinge-side of the door frame perfectly straight and level, adding shims and sturdy screws into the wood and brick. With door installation, the hinge side is everything. Then do the other hinge side. Perfectly straight and level. Now you can hang the door panels back onto their hinges, and shim and adjust the top and bottom jamb boards create a nice, uniform gap. Nail and screw everything well. Finishing Up: Add insulation around the doors, figure out your own trim details inside and out, then patch, caulk, and paint as you see fit.