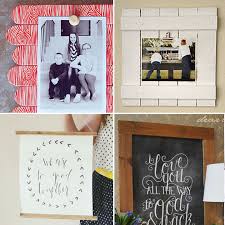
wall decor do it yourself ideas

Real DIY Wedding Centerpieces Real DIY Wedding Favors Real DIY Wedding Flowers Real DIY Wedding Signs All Real DIY Wedding Decorations ▸ Real DIY Wedding Invitations Real DIY Wedding Programs All Real DIY Wedding Stationery ▸ 6 Creative Wedding Program Templates 7 Wedding Invitation Templates DIY Wedding Program Basics DIY Wedding Photo Album All DIY Wedding Advice ▸ Wedding on a Budget From DIY wedding invitations to wedding centerpieces, do-it-yourself weddings have taken off in popularity and it's a chance for couple's to show some creativity. Whether you’re a craft connoisseur or your skills are less-than-stellar, we have DIY wedding projects for every bride and skill level.DIY Home Decorating shared Nifty's video.Posted by NiftyThis easy hack removes burnt-on food for perfectly-baked holiday cookies every time. 🍪✨ Get some of our favorite cookie recipes here: bzfd.it/2h8ZyNiRecently, I received a promotional package in the mail from Dow Chemical with all the supplies needed to make modular wall decor.
four 12" x 12" x 15/16" pieces of Styrofoam, four 12" x 12" sheets of black and white scrapbook paper, several yards of 7/8" wide black grosgrain ribbon, a bottle of Aleene’s Original Tacky Glue, a bottle of Tombo Mono Aqua Liquid Glue, The instructions were as such: ‘Cover foam with coordinating sheets of 12" x 12" scrapbook paper; thick white craft glue works great.’ This left me scratching my head as I considered the Aqua and the Tacky. Why use the thick craft glue? Won’t that make the paper ripple? It always has in the past when I’ve used it to glue paper. And I’ve used clear liquid glues before when glueing paper with good results, so I decided to use the Aqua (hey, I figured it was included in the box for a reason!) to glue the paper to the Styrofoam. Next, I used the Tacky Glue to glue on the grosgrain ribbon around the perimeter of the foam squares. I overlapped the ribbon at one corner and pinned it into place just until it dried.
Although I didn’t have to buy any of the supplies, its cost shouldn’t be that outrageous. The accompanying brochure suggested that–at most–the supplies should set you back no more than 50 bucks.
easy table decorations to make for christmasThe squares are very light weight, which means they could be held up on a wall with just a straight pin, which means no big holes in the walls, which is good for renters.
cheap winter wedding table decorations Now the bad part: The rippling of the paper still bugged me. If I did the project again, I’d experiment with different types of adhesives, possibly trying a spray adhesive or even sticky-back tape. Assuming the nails of the picture hanger would actually stay put in the Styrofoam would be naive. I’d put a few drops of the Tacky Glue on the nail heads and hope for the best.

Also, the Styrofoam measured 15/16" thick and the ribbon 7/8", which left 1/16" of the Styrofoam showing. Ultimately, the promotional materials included in the package provide some fabulous pictures that could inspire all of us to give this project a shot–with a little tweaking here and there. Another option is mounting photos or even fabric on the Styrofoam. For more information about Styrofoam and other projects using it, visit craft.dow.Build a cozy and warm place in your backyard or patio by diy fire pit. Invite your friends and family on a cool evening and enjoy this outdoor gathering place.This idea will just amaze you with its simplicity and you will repent not finding so simple way of having a diy fire pit earlier in your life. You will need nothing more than bricks, stone pavers or some other non-flammable brick-like structure.This is also one of the most convenient outdoor fire pit ideas to have up your sleeves. There are many neighborhoods where campfires need to be confined to some sort of containment systems, leaving room for only small and controlled fires that are easy to extinguish with minimal embers and sparks left behind.
This DIY tutorial by instructables will look Godsend to you under such circumstances and the good news is that it won’t cost you much more than $50 to $60.Do you mind listening to a readhead? Well, you need to listen to this one at least, who is ready to help you build your own outdoor fire place even if you have little money or little experience in doing this sort of stuff.Here is yet another fine idea with all DIY details if you were looking to spare only a little of your time and money (perhaps!). Don’t worry if you don’t like much to read. You won’t have to, because this also hosts videos to help you better in your endeavor.Here is another DIY fire pit idea for you, but a slightly different one, because this one burns on propane. The best part is that it is much more portable than some of the more conventional types of fire pits. WcWelding is where you will find how to get one like this in your backyard.How to nest for less are here with another wonderful that not only costs you very low, but also takes no more than 30 minutes of your time.

If you are wondering about its name, you will get to know exactly why it is named so once you get it finished; homemade, personal and really cheap ….. nothing more to ask for. bring this fabulous idea to you.So, here it is …….. just another one of those super awesome . This time around, it is THE BRICK HOUSE that shares the idea with you, so three cheers to them!You better not raise your eyebrows on its name, because this thing will really turn your garden into a retro space to have fun time with your friends and families. Everyone needs to thank This Old House to share this with us.Instructables are here again to help you build and boast of your own . Just follow the tutorial well and invite your family and friends for a pleasant surprise.It’s quite simple, if you want to build it like a pro, you need to put some serious time and money of yours (around $500 tops!). And for pro assistance, you have got none other than The Family Handyman.Surely, it’s not an easy thing to build for yourself, but see how wonderful it looks in your garden when done, especially with that old beer barrel serving as .

And you get such cool ideas by no one other than houzz.And if you were looking for an , natalme are more than ready to share one with you here.Tools 2 Tiaras is the place to look forward to a serious backyard project for your .If you were concerned with eco-friendliness of all the DIY ideas mentioned previously, fine Craft Guild are eager to help you with environment friendly version of fire pits here.If round is not your preferred way to go around and you are strictly looking to have a square one for your outdoor space, Goods Home Design have got exactly what you need as a .If you have ample time and space, you might also try this concrete version by ehow. It will surely turn into an outdoor centerpiece for your garden.Do you have an old washing machine drum rotting down your garage? Can you spare around $10 and an hour of your time? Well, you would consider yourself lucky if you did so. Apartment Therapy just bring forth an ingenious pocket and time friendly . This is how convenient you can make your life with a little bit of creativity and willingness to work!