the steps to decorate a christmas tree
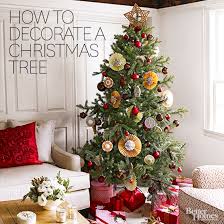
How to Decorate a Christmas Tree The secret to decorating a pretty Christmas tree is simple: Style in layers! Get more tips for Christmas tree decorating with these easy instructions. Share your take on this idea!Upload your photo here. Christmas Tree Decorating Traditions During the Christmas season, it's wonderful to pass houses with majestic trees in the living room window, decked out in lights, garland, and ornaments. Decorating a Christmas tree is a time-honored tradition for many households, even though Christmas tree decorating as we know it now didn't gain popularity in America until the late 19th century. Early decorations were mostly homemade ornaments and brightly dyed popcorn garlands, but today's decorations include everything from souvenir ornaments to vinyl records and -- of course -- lots of twinkling lights. Not sure how you want to decorate? Follow our three easy steps for decorating a Christmas tree. Step 1: Hang Christmas Tree Lights The first step in how to decorate a Christmas tree is adding the lights.

Tree lights typically come on green or white wire strands; choose the strand color that matches your tree so the wire will be hidden. Illuminating your Christmas tree from the inside out will give it the most dynamic look. Start at the base of the trunk and work your way up, wrapping lights around every major branch, moving from the trunk to the tip and back. Here are four popular types of lights to choose from when decorating a Christmas tree. Traditional incandescent lights: These Christmas tree lights, which come in a variety of sizes and colors, are the most popular type of tree lights. They warm up the branches of a real tree, which will release the scent of pine into the room. LED lights: These Christmas tree lights are newer than the traditional incandescent lights and don't produce heat. They're typically more expensive, but they are flameproof, fireproof, and completely safe to decorate a Christmas tree with. Globe lights: These Christmas tree lights are round and come in many sizes.
They look like balls of color on the tree, and while they have a softer glow than mini lights, the light they produce covers a larger area on the tree. Bubble lights: These retro lights stand straight up on the limbs of your Christmas tree. When the liquid tube on top of the light warms up, bubbles float up and down inside the tube, resembling lava lamps. Experiment with different lighting schemes until you find one you like -- it's OK to mix and match lights. For example, a background of white or clear lights can be highlighted with strands of colored lights that wrap the outer areas of the tree. More on How to Put Lights on a Christmas Tree Our Best Tree-Trimming Tips Ever Step 2: Add Christmas Tree Garland There are no firm rules for decorating a Christmas tree when it comes to draping garland. To avoid branches bulging between tightly cinched garland strands, start at the top of the tree, and slowly increase the amount of garland between each wave as you work your way down the branches.
Plan to use about two strands of garland for every vertical foot of tree.
nice exterior house paint colors To avoid a busy look on your tree, decorate your Christmas tree with a variety of garlands from plain to fancy.
free home exterior design software onlineThin, beaded garlands look best hung from branch to branch;
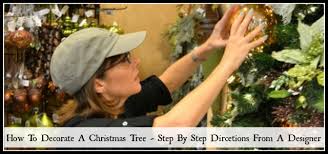
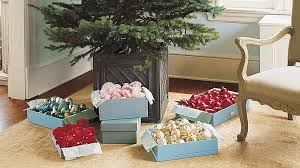
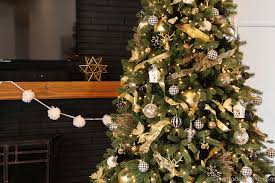
decorations for christmas tree diythicker paper, ribbon, or foil garlands look best wrapped loosely around the entire tree. Step 3: Hang Christmas Tree Ornaments The next step in decorating a Christmas tree is to hang your Christmas ornaments. To showcase your favorites, place them in prime positions on the tree first. Next, hang your larger ornaments, spacing them evenly around the tree.

Fill in around those ornaments with medium- and small-size ornaments. Be sure to hang some ornaments closer to the trunk to create depth and interest. Finish dressing the tree by adding specialty items, such as clip-on ornaments or icicles. See our ideas for easy ways to make Christmas ornaments that add a personal touch to your tree: Easy Christmas Tree Ornaments 20 Ways to Dress Up Plain Christmas Ornaments Easy Christmas Ornaments Kids Can MakeThis weekend, millions of Brits will be dusting off their baubles as the Christmas tree decorating season begins in earnest. But is there a right way or a wrong way to decorate a Christmas tree, and how can you make yours look fit for a Harrods window display? We've spoken to experts at John Lewis for some help. Here's our 10 step "treetorial" on how to decorate a Christmas tree like a pro. Christmas gift ideas: The ultimate guide to what to buy Step 1 - Pick a location Real or artificial, you need to think carefully about where to position your tree, especially if space is at a premium in your home.
Ideally it will be near a plug socket, to avoid the need for unsightly extension leads, or perhaps near a window so all your neighbours can admire your handiwork. Re-arrange furniture if necessary and try not to block any thoroughfares. You don't want wagging tails and little fingers messing with your festive foliage. If you've got a real tree, pick a location that's as cool as possible (away from radiators and fires ideally). This will prevent it from drying out ahead of the big day. /NsaFaLp179— Hever Castle (@HeverCastleLtd) November 29, 2016 Step 2 - Measure up Once you’ve found the perfect space, measure the width, depth and ceiling height and don’t forget to factor-in the height of your tree stand and your decorative topper too. Give your tree plenty of room so its branches hang freely and you can decorate all around. Tip: If you've got a real tree that's too tall, always trim it from the bottom so it maintains its triangular shape. What is the best real Christmas tree, where can I buy them and how long do they last?

Step 3 - Fluffing Fluff those branches. Yes, that's official advice from Christmas experts at John Lewis who say artificial trees especially need serious "fluffing". (You'd probably need "fluffing" too if you'd been squashed in a cardboard box in the loft for 12 months.) John Lewis assistant buyer Christmas Scott Bartle advise: "Spend 45 minutes putting your tree together and fluffing the branches to give it that full and authentic look. It's all in the preparation. If you've fluffed your tree and the lights are even, you can't go wrong." S Step 4 - Let there be light Make sure you spend a good half an hour or so getting your Christmas lights positioned just right. Start from the top and work your way down, weaving them around every major branch and leaving about six inches between the loops. How many do you need? Mr Bartle says you can never have too many. "We recommend at least 170 lights per metre of tree," he says. "That's the absolute minimum. Personally I'd put 1,000 lights on a 6ft tree. T

he more the better." If you need new lights, it might be worth investing in copper wire lights - they're much less likely to break, give a cleaner, crisper and brighter light - plus you'll barely notice the wire on the tree. Tip: Protect your sanity and make sure the lights are working before you put them on. Step 5 - Colour scheme Picking colours that go together and staying "on-theme" can be a minefield for the creatively inept. If in doubt, keep it simple. Reds, greens and golds fit traditional-style rooms. Use yellow and white lights as LED lights can give a blue tinge. You could go for a wintery look using lots of silver, blue and purple, or for a truly minimalist tree choose just white and silver decorations. John Lewis has a variety of different themes if you want a starting point, including Ruskin (“heritage patterns, natural motifs and rich colours”); Snowshill (“natural materials bring the outside in”); and Helsinki (“the quiet beauty of the forest”).

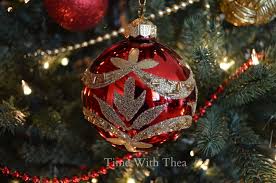
Tip: Variety is key - don't go too matchy, matchy with your theme and decorations. Step 6 - Garland Either beads, ribbon or foil, garlands add texture to your tree. Again, start from the top and work your way round. You'll need two strands of garland for every vertical foot of tree. Tip: It's best to do this before the baubles and other decorations, so you don't knock them off. Step 7 - Baubles Now here's the fun bit. When hanging baubles, start from the inside of your tree and work out. Start with plain-coloured baubles as a base, (a cheaper, multi-pack is ideal) adding in more decorative, expensive baubles later. Hang the biggest ornaments deeper into the tree to give it depth, and smaller ones on the ends of branches. Space them evenly and use a variety of shapes and sizes. If you find a bauble that you like, Mr Bartle suggests buying them in multiples of three because it will give your tree balance. Never throw out old decorations either, as they might fit your colour scheme in a few years - plus they serve as lovely memories. H
aving said that, don't adorn your tree with every decoration you can find - be selective. Tip: Move expensive, glass baubles to the top - you know what will happen to them otherwise. Christmas tree decorations: Best baubles, ornaments and lights Step 8 - Tree skirt Don't embarrass your tree and leave it without a skirt. Unless you want everyone to see your extension lead and the ugly plastic tree holder, you'll definitely need one. Tree skirts also catch pine needles if you've got a real tree. "Who wants to see the workings of their artificial tree. It takes away the realness of it. Tree skirts hide wires and it makes it look much cleaner and tidier," Mr Bartle says. N Best Christmas tree skirts and where to buy them Step 9 - Topper Now for the crowning touch to your festive masterpiece - an eye-catching Christmas tree topper. Traditional topper options have their roots in religion - the star representing the Star of Bethlehem which guided the Three Kings to baby Jesus, while the angel symbolises the angels who announced the birth of Jesus to the shepherds.
If you're not keen on either of these, there's lots of other options on the market to suit all tastes, including personalised toppers, snowflakes and birds. (Apparently peacocks and flamingos are on trend this year). Tip: Beware of toppers that are heavy - they will have to sit on the flimsiest part of your tree for several weeks so make sure your topper isn't in danger of toppling. Step 10 - Decorate remaining trees All the decorations are on and you're quite pleased with your efforts. Now's the time to sit back with a cuppa and marvel at your masterpiece, right? Nope, afraid not. If you're intent on keeping up with the Joneses, you're going to have to decorate two more trees. A true three-tree household will have beautifully decorated do-not-touch-for-fear-of-life "show" tree, (usually in the lounge), that can be admired by the neighbours, and under which Father Christmas will deposit his haul. The second tree will be child-and-dog proof, sitting well out of public view in the family room or play room. T