proper way to paint the exterior of a house

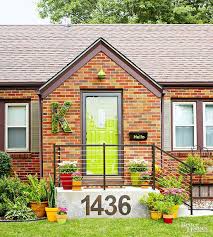
How To: Paint Brick Painting tired or out-of-place brick, whether inside or outside your home, is an inexpensive, fairly quick route to an updated—or just cleaner—look. Before you get started, however, expect to do some prep work. There are a host of reasons that homeowners choose to paint brick: • If a brick fireplace is out of sync with the decor of a room, it’s less expensive to paint it than it is to replace the brick with another material. • A coat of light-color paint can alleviate the feeling of heaviness that a brick wall can impart. • If a home’s brick exterior needs a makeover, painting it can give the property a fresh look, boosting curb appeal and perhaps even resale value. Although any DIYer can paint brick, there are certain precautions and procedures to follow to ensure color success. Before painting brick, always clean it thoroughly so that your application of paint better adheres. Dirt and efflorescence should come off with soapy water and some diligent scrubbing with a stiff-bristled brush.

Try trisodium phosphate (TSP): A half-cup mixed into a gallon of water ought to do the trick. (If you happen to own, or are willing to rent, a pressure washer, consider using one, especially if you need to clean a relatively large expanse of brickwork.) Where you encounter mildew, apply a solution of one part bleach to three parts water; after letting it soak for half an hour, proceed to scrub the area with a wire brush. Never use acid cleaning solutions, any of which might compromise your paint job. If the brick has been installed recently, allow it to dry and acclimate for at least a year before painting it. If the installation has already been in place for years, check the mortar for signs of damage. Repair small cracks with acrylic caulk. With more pronounced issues, repointing the brick may be necessary. Whether or not you make any repairs, remember that brick must be completely dry for the paint to adhere successfully. After cleaning, delay painting for a period of at least 24 hours.

Depending on the area of the surface you wish to paint, use a brush or roller—or a paint sprayer—to apply a coat of latex primer. Put additional coats on those sections that have been affected either by efflorescence or mildew. Whether you add one coat of primer or a few, let the primer dry completely before going any further. When it comes to paint (as opposed to primer), many favor the use of elastodynamic paint for brick. It features (as the term implies) a high level of elasticity, which makes it excellent for filling cracks as well as preventing them. Plus, elastodynamic paint performs well in all weather—not only precipitation but also high humidity. If you cannot find or don’t wish to use elastodynamic paint, don’t hesitate to opt instead for regular acrylic latex exterior paint. In fact, for exterior brickwork, acrylic latex may be the superior choice, because it’s designed to stand up against mildew and to quickly evaporate any moisture that it absorbs.

The easiest way to paint brick is with a paint sprayer, but if you are covering only a small area, such as a fireplace, brushes or rollers are sufficient; in fact, for those with no experience operating a sprayer, these low-tech painting tools are recommended. If you plan to use a roller, choose one with a thick nap to ensure best results on brick, which is riddled with nooks and crannies and surface irregularities.
best exterior paint color for selling a house For interior and exterior brick, many experts recommend semi-gloss or gloss paint;
home decorating ideas for apartmentseither type accentuates detail and, compared with other paints, is easier to clean as time goes by.
christmas decorations for office contest
So long as the brick is in decent condition, you have another finishing option: stain. Quicker and easier than painting, staining highlights (rather than conceals) brick’s unique texture. Preparing brick for staining is no different from preparing it for painting. In either case, clean the surface thoroughly, allowing it to dry completely before moving forward. If you do not intend to stain the mortar, then seal it off with painter’s tape. (You can also use this trick if you decide to paint after all.) With the brush that comes in the staining kit, test the stain on an inconspicuous part of the brick installation. Darken or lighten the tone by adding pigment or water, respectively. Once you have a mixture that imparts a color you like, spread on the stain by moving the brush in a uniform direction. Alternatively, for a more even application, use a clean rag to wipe the stain onto the brick. Spread the stain as thinly possible, wait 24 hours, and then add a second coat.

Along the way, remember to wear goggles and gloves. Of all the options available to remodelers, paint provides the quickest, easiest, and most affordable way to achieve a transformation, inside or out. Ready to look at your home in a new way? Click now for the color ideas to make your project beautiful.How To Paint the Exterior of a House Using an Airless Sprayer Update the look of your house this year with the help of a Graco sprayer. You’ll finish in a fraction of the time it takes to paint with a traditional roller or brush, leaving more time to enjoy your summer. Safety Notice: Whenever operating spray equipment, take proper safety precautions, stay alert, and be mindful of potential hazards. Wear protective gear such as gloves, safety glasses/goggles, spray sock (hood), hat, proper footwear, dust masks and respirators. Make sure there is adequate ventilation. If you’re painting in the vicinity of appliances, turn them off. (See Safety Precautions in your Sprayer Operation Manual.)

Always refer to the specific instructions and safety procedures for the spray equipment you are using. How to Spray a House: Quick Summary 01:07 Graco, Magnum, or TrueCoat Paint Sprayer (see comparison chart or sprayer selector) Spray tips – a wider spray pattern for large surfaces and narrow size for smaller surfaces (see tip selector) Empty buckets for priming sprayer and cleanup (two needed) Paint strainer bag – helps prevent tip plugs and provides a better finish Tarps, drop cloths, or plastic sheeting Paint brush for touch-ups Magnum tip extension/TrueCoat tip extension (optional) – for hard-to-reach areas that would otherwise require a ladder Pressure roller kit (optional) Additional airless hose sections if needed Pump Armor storage fluid or TSL fluid (see pump protectant product details) Stiff nylon brushes for cleanup Safety and protection equipment – safety glasses/goggles, dust mask/respirator, spray sock or hat to cover head
Move all outdoor furniture or any other items such as a grill away from the area to be sprayed. Allow plenty of space for your tools and equipment. Tape off any trim, and cover any surfaces you don’t want sprayed such as windows or shrubs with plastic. Use a pressure washer and cleaning solution to wash the entire area that is to be painted. Allow surface significant time to dry. Remove any dirt, mildew, or mold, and scrape off any peeling paint. Repair any damaged siding, soffits or trim. Drive any loose nails flush. Sand any rough surfaces and caulk gaps as needed. Select the spray tip that’s best suited for the paint you are using and the surface to be sprayed. Be sure the tip’s hole size does not exceed the maximum capacity of your sprayer (see spray tip info). If you’re using paint from multiple containers, mix it together in an empty 5-gallon container to ensure consistent color even if small color differences exist between individual paint cans. If you don’t have a lot of spraying experience, choose a flat surface such as the side of the house or other area that won’t readily be seen to begin on.

Start at the top of the area and work your way down, first spraying any eaves or undersides of any overhangs. The direction you will spray depends on the construction – as a general rule, spray any exposed trusses, wood beams, or boards by aiming the spray fan pattern to follow lengthwise. Work in sections only as far as you can comfortably reach, keeping the spray tip approximately 12 inches from the surface. (A tip extension is a useful accessory, as it will allow you to safely spray hard-to-reach areas such as eaves or other overhangs from your ladder.) Spray the outer edges first, “banding” the area that you will spray. For inside corners, aim the spray tip directly into the corner so that the spray fan overlaps both sides. Overlap your spray passes pass by 50%. After you have completed the eaves, spray the exterior walls themselves. Cut in around windows and doors first, and then spray the remaining flat areas, overlapping each pass by 50%. Visit How to Use a Paint Sprayer: Spray Techniques for more spraying pointers.