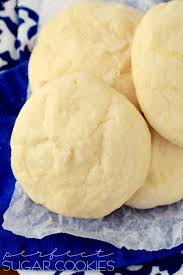
perfect sugar cookies and icing
During the holidays, your cookie jar should always be full.For more Christmas cookie inspiration, try these snowball cookies, thumbprint cookies, and linzer cookies.CIA Taste by The Culinary Institute of America, The world's premier culinary collegeSend me CIA E-news! Stay Connected with Us: Rolled-Out Sugar Cookies with Royal IcingA variation on the chewy drop cookie version, these are perfect for any cut-out cookie project you tackle. Royal icing will dry to a smooth, shiny finish. Dye your royal icing with liquid or paste food coloring. Use a toothpick to dab a small dot of color in the icing and mix to an even color with a rubber spatula. If you want deeper colors, add dots of color incrementally after completely incorporating the previous dots to achieve the color you want. Do not add too much at one time, as these colors are highly concentrated and difficult to lighten once too dark. Note: If not using immediately, cover the icing with a damp

paper towel directly on the surface, cover the bowl with plastic wrap, andOtherwise, the icing will form a skin and/or dry out completely. After refrigeration, bring back to room temperature and recheck the IngredientsRolled-Out Sugar Cookies Makes about 4 dozen cookies 8 Tbsp (1 stick) unsalted butter1 3/4 cups sugar1/4 tsp salt2 tsp pure vanilla extract2 eggs4 cups all-purpose flour1/2 tsp baking soda1/2 tsp cream of tartarRoyal Icing4 egg whites, or more as needed1/4 tsp cream of tartar5 cups confectioners’ sugar, sifted, or more as neededDirectionsRolled-Out Sugar Cookies In the bowl of a stand mixer fitted with the paddle attachment, cream the butter, sugar, and salt on medium speed until light and fluffy, 3 to 4 minutes. Reduce the speed to low.Gradually add the vanilla and eggs, scraping down the bowl after each addition.Sift the flour, baking soda, and cream of tartar together into a medium bowl. Add to the creamed mixture and mix just until combined. Scrape down the bowl as needed.

Wrap the dough well in plastic wrap and refrigerate until chilled, 15 to 20 minutes.While the dough is chilling, preheat the oven to 350°F. Line two baking sheets with parchment paper.On a lightly floured surface, roll out the dough to about 1/2 inch thick. Cut as desired with floured cookie cutters. Transfer the cookies to the prepared baking sheets, spacing them about 1 1/2 inches apart.
wall art decor at targetAs you are working, reserve the scraps so they may be rolled again and cut.
decorating ideas bathroom accessoriesBake until lightly golden around the edges, 6 to 8 minutes.
diy outdoor christmas decorations lights
Rotate and switch the baking sheets as necessary for even baking.Allow the cookies to cool for a minute on the baking sheets then transfer, using a spatula, to a cooling rack and allow to cool completely.Store the cookies in an airtight container. Royal IcingIn the bowl of a stand mixer fitted with the whip attachment, whip the egg whites on low speed until loose, about 1 minute.
exterior home color combinationsAdd the cream of tartar and continue mixing on low speed until the whites become frothy, about 2 minutes more.3.Gradually add the confectioners’ sugar with the mixer still on low speed.
diy holiday decor pinterestContinue to mix until the icing holds a soft peak, about 2 minutes more.
bedroom wall decor ideas diy
Add more confectioners’ sugar or egg whites as needed for thicker or thinner icing. Want new recipes delivered to your inbox each quarter? Sign-up for our Tasty Bites & Sips Newsletter. Or sharpen your skills and learn to prepare similar recipes in our Boot Camps and Saturday Kitchens classes. Condiments, Dressings, Glazes, and Sauces Contact Us1946 Campus DriveHyde Park, NY, 12538-14991-800-888-7850 orinternational calls only at 845-452-2230 Rolled Sugar Cookie Cutouts I love sugar cookies. I love them soft and chewy in a sugar shell. I love them light, fluffy, and fully frosted. I love them any and every which way, but I especially love them when they're rolled and cut. Rolled sugar cookies have a texture like no other, light and crisp if they're baked golden brown, but amazingly soft and tender when left a little pale. Most of all, they're beautiful, a chance to showcase the various cookie cutters I've collected over the years. Most cut-out cookies start with a 1-2-3 dough, made from one, two, and three parts sugar, fat, and flour, by weight.
There's no better formulation when you want a cookie that can hold an intricate shape, but truth be told it's not the tastiest combination around. All that flour keeps the dough stiff, yes, but the cookies can't help but taste like a mouthful of flour, no matter how much salt and vanilla you add. My recipe is a little closer to a ratio of 2:2:3, which gives the cookies a higher proportion of sugar relative to the flour. Instead of butter alone, I use a bit of coconut oil, too. Butter contains water, so cutting it with coconut fat lowers the water content of the dough, upping the richness of the cookies, and thereby improving their shelf life—an essential quality for make-ahead cookies destined for gifting and care packages. Virgin coconut oil adds a subtle but distinctive flavor, while refined coconut oil keeps the sugar cookies perfectly neutral. Coconut oil also makes for a paler dough, and one that browns less in the oven, so your snowflakes will look snowy and your dyed doughs won't discolor (if you're making, say, slice and bake pinwheels).

Okay, sure, the higher ratio of sugar allows the dough to spread a bit in the oven, but it's way more delicious—a trade-off I'm more than willing to make. That's not to say the cookies spread to some wild extent; you'll simply want to avoid unusually complicated shapes. As long as your cutters aren't too intricate, the cookies will bake up just fine. The process itself is pretty dang simple: Cream the sugar, butter, coconut oil, and vanilla together until light and fluffy. This aerates the dough, which helps to minimize spread (more on the science of creaming here). I also cream in the baking powder, baking soda, and salt; several minutes of creaming will distribute these essential ingredients more evenly than simply whisking them into the flour, and it will also produce a slight waterproofing effect that helps the dough last longer in the fridge, if it needs to be held for a few days (more such make-ahead tips here). Do be sure to scrape the bowl at least once along the way, as a dense, poorly aerated paste can build up along the sides.

You can see how much darker it looks in the photo, whereas the more aerated portion looks pale and light. Left unattended, the denser areas can streak the dough and cause it to spread unevenly as the sugar cookies bake. Once the butter is light and fluffy and homogeneous, beat in a cold egg (this keeps the dough nice and cold), mix until smooth, then add the flour. Stop mixing just before it's fully absorbed, then fold it a few times with a flexible spatula to finish up by hand. I like doing this with rolled doughs to offset the potential for over-working the dough with rolling and kneading later on. Feel comfortable rolling a soft dough? By using gentle pressure with a rolling pin on a generously floured surface, there's no need for refrigeration. The idea is to use the pin to guide the dough as it spreads across the counter, rather than using it to smash the dough down. Beating the dough into submission with heavy pressure will only grind it into the counter, where it will certainly want to stick.

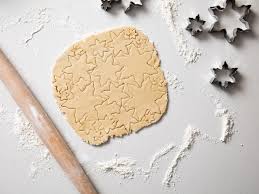
If the dough feels softer than what you're used to, or if you would like a nice place to pause, divide the dough in half, wrap in plastic, and chill for up to a week. Briefly knead the cold dough until pliable, which will keep it from cracking as you roll it out. Aim for a thickness of 1/4-inch, which is perhaps thicker than you can accurately judge by eye alone, so grab a ruler. It's certainly thicker than most recipes call for, but it makes the cookies more sturdy. This in turn helps them hold up better, whether they're going to be shipped across the country or taken for a ride across town. While rolling, use as much flour as needed both above and below; the excess flour can be brushed off. (Don't roll the dough in powdered sugar, which has a tendency to form a crusty layer on blended fat doughs.) Before cutting the dough, slide an offset spatula underneath. This will loosen any sticky patches and prevent delicate shapes from tearing as you lift them out. It also removes the extra flour that can sometimes accumulate around the dough.

Cut the dough with your favorite cookie cutters, using an assortment of sizes or shapes to help keep scrap pieces to a minimum (I'm in love with the utility of this 5-Piece Snowflake Set). Transfer the cutouts to a parchment-lined half-sheet pan, leaving plenty of space between each one to account for how they'll spread. ULee Christmas Cookie Cutters Set - 5 Sizes of Snowflake Shapes on Buy The cookies will be super fragile when they first come out of the oven, so be sure to cool them directly on the baking sheet. Once firm, you can slide the parchment onto the counter or a cooling rack to reclaim your baking sheet, but do make sure it's thoroughly cool before baking the next round. Once the cookies have cooled, dust with powdered sugar, top with your favorite frosting, or transfer to a zip-top bag to finish at a later date. If decorating is your plan, check out my totally not-too-sweet Royal Icing Tutorial and Christmas Cookie Decorating Techniques too. Thanks to the higher proportion of sugar, these rolled sugar cookies will keep up to a week at room temperature if stored in an airtight container (my friends insist they're still great at 10 days, but I think they're just being sentimental; by then, the texture will have started to go south).