paint for an exterior steel door

As I write this post about oil-based paint I realize that the information is quickly disappearing from both common knowledge and usefulness today. If you live in California I don’t even think you’re allowed to buy oil-based paint anymore (at least not in any significant quantities). The landscape of house painting has been changing ever since water-based paints were first introduced by Sherwin-Williams in 1941. Kem-Tone, as it was called proved that water-based paints were a possibility. And it’s no secret that water-based, or latex paints, are easier to work with, better for the environment, and longer lasting than most oil-based paints. But there is still a place for oil-based paint today. And if you live in an old house, knowing how to work with oil-based paint is almost a requirement. What You Need To Know About Oil-Based Paint Slow-Drying – Oil-based paint is notoriously slow drying and the reason we have the saying “It’s like waiting for paint to dry.”

Most oil-based paint takes about 8 hrs to dry enough to recoat as opposed to latex paint which takes around 2 hrs to recoat. This may sound like a problem at first as it definitely slows down the whole process. But this slow drying allows oil-based paint to flow out better and provide a smoother finish than latex paint. This slow process allows brush marks to level out remarkably well. Good Ventilation – If you’re working with oil-based paint you need better ventilation than you do with latex paint. Make sure to open windows and put a fan in the doorway to pull in fresh air. Oil-based paints usually have a much higher VOC content than latex paints which is why the extra ventilation is needed. Yellows in Dark Areas – If you have old oil-based paint on your closet’s baseboards chances are it’s pretty yellow. Light colored oil-based paints are notorious for yellowing with age and in dark areas, The more sunlight it gets the less it yellows. If exposed to more sunlight the yellowing will fade away though, and though today’s oil-based paints have gotten better about holding their color it’s still a problem.

They will usually say “For Oil-based Paints” on the brush holder. Hard Finish – One of the qualities of oil-based paints that manufacturers have struggled to create with latex paint is a hard durable finish on enamel paints.
wedding ideas for spring cheapFor doors, trim and moldings nothing beats the hard, durable finish of an oil-based enamel paint.
christmas cake decorating techniquesAnd that hard finish makes it an excellent choice for doors and windows because that hard finish eliminates the sticking that often happens with latex paints. The hard finish also unfortunately prevents the paint from being as flexible as latex which is why old oil-based paints begin to crack and chip off. Temperature swings and expansion of the surface eventually breaks the harder paint film of an oil-based paint.
Difficult Clean Up – If you’re painting with an oil-based paint the clean up is a bit more involved. Oil-based paint is pretty much impervious to water so you’ll have to use paint thinner or mineral spirits to clean your brushes. Here’s some tips for using mineral spirits: Make sure the area is well-ventilated. Pour some into a bowl and vigorously mix your brush for about a minute. Pour the used portion into a sealable metal container. Repeat this process until the mineral spirits comes out clear and the brush is clean. Dispose of the used thinner or mineral spirits at your landfill’s hazardous waste drop off. And there is one last thing you need to know about oil vs water based paints . . .I would think it’s obvious to most people the mixing a can of oil-based paint with a can of water-based paint wouldn’t be a good idea, but I’m talking about something else here. If you are painting oil-based paint on top of latex paint then you have to prime the latex first.

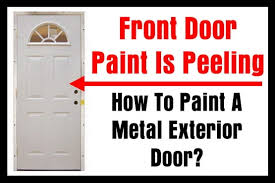
Latex paint and oil-based paint expand and contract at two different rates. So, if you paint oil-based paint on top of a latex paint without priming first, the latex will flex so much underneath that the oil-paint will quickly fail. You can get away with painting a latex paint on top of an oil-based paint without primer, but just to be safe, it’s always a good idea to prime first when you are switching from one type of paint to the other. Hopefully this has been a good “primer” (<—Sorry, I couldn’t resist the painter humor) for working with oil-based paint. If you have any tips I may have forgotten please share them in the comments below.The paint is peeling off my front door. I am going to repaint it and need to know the best way to do it. It is made of metal/steel not wood. I will be painting the exterior side and the interior side of the door. As of now there is only one coat of paint on the door and it is peeling up. For repainting purposes, what is the best way to prep, prime, and paint a metal door?
Do I need to sand it down all the way to bare metal? What type of paint should I use to prevent peeling in the future?Front Door Paint Is Peeling – How TO Fix1 – SAND THE DOOR DOWN COMPLETELY Always sand the door down properly or the new paint will not adhere. If the door is not sanded down correctly, the new exterior paint will not stick and eventually bubble up and peel off. Exterior paints have different chemicals and oils in them to help withstand the weather. Sanding the door down properly will let the exterior paint stick and adhere correctly. 2 – USE THE PROPER EXTERIOR PAINT Always use an exterior type of paint when repainting the outside of your door. When you paint a door that faces outside, if you use an interior type of paint, the paint will stain, possibly dissolve, and not withstand the weather. Always be sure you use an exterior paint when you are repainting your front door, whether it is metal or wood. (Wear gloves and eye protection during this complete process) 1. Remove the door from the hinges and lay it down on a flat surface.

(Use a couple saw horses to lay the door horizontal and so the door is not on the ground) NOTE: If you attempt to paint the door on the hinges while the door is vertical, you will have large drips and runs in the paint. 2. Remove all hardware on the door such as hinges, door knob, deadbolt, etc. 3. Prep the area for sanding and painting by laying down a few cheap plastic tarps. 4. Use a wire scraper brush to scrape off the old peeling paint. 5. Use an orbital sander with different grits of sandpaper and sand off all the existing old paint. 6. Use a TSP solution (Tri-Sodium Phosphate) to clean the door to be ready for priming and painting. 7. Use a primer on the metal door that is made for metal/steel. (Glidden – Rust-Oleum – Sherwin Williams – Benjamin Moore = Primer/Sealer) NOTE: You can use a type of exterior paint that already has the primer and sealer in the paint if you choose. 8. Paint the door with exterior paint using a sprayer, sponge roller, or roller and brush. (Glidden – Rust-Oleum – Sherwin Williams – Benjamin Moore = Premium Exterior Paint)