diy room decor painting
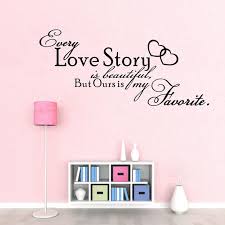
diy idea: paint strip wall decoration lauren and derek are under the weather today so i thought i’d wrap up diy day with this great project from d*s reader scott prendergast of a state of emergency. scott started with a simple idea- to decorate his bedroom wall with something colorful and affordable. so he went to home depot every day for a few weeks and took around 1000 paint swatches. after he arranged his collection in the desired pattern he used mod podge to attach them to the wall and- voila! a new colorful bedroom wall. i know some of you won’t want to lift 1,000 samples so if you’d like to purchase samples instead you can contact your local hardware or paint store to purchase packs (my local tarzian hardware store told me they could order some for a small price). either way, the result is a colorful, and more customized, alternative to wallpaper. thanks to scott for sharing!Renting instead of owning definitely has its perks -- you have the flexibility of changing up your location when your lease is over, there's no need to worry about property taxes and, more often than not, home repairs are not taking a toll on your wallet.

Yes, this stuff exists. It was first made for movie sets, but now there are dozens of products made just for renters (or commitment-phobes).
cheap wedding favors wholesale china 3. Turn bookshelves into focal points.
home decor ideas tumblrWhether you're adding patterned paper to the shelf backings, organizing your books in a creative way or painting the furniture itself, customized bookshelves can have big impact for little effort. 4. Put up a colorful memo board to your entryway. A small way to incorporate color, plus give you a space to mail, grocery lists, etc. 5. Try a few window boxes. And as an added bonus, having plants in or near your space has been proven to amp up your productivity. 6. Get creative with storage. Chances are, you don't have enough space in your apartment.

But, you can slip in storage with things like bar carts, rolling kitchen islands and ottomans with hidden compartments. 7. Add a rug. Though you can use any carpet that fits your budget, jute rugs are inexpensive, go with anything and come in nearly any size. A large rug completely covers imperfect floors (and protects them, too). 8. Paint your furniture. We're not saying every piece has to be a bright yellow or a bold turquoise, but that surprising pop of color on a coffee table or your kitchen chairs can make a huge difference. 9. Grab some tile tattoos. These are temporary stickers and decals that can nicely hide that '80s fruit-motif backsplash in your kitchen. 10. Change those knobs and pulls. Just because you didn't choose the cabinetry doesn't mean it can't be customized. 11. Rearrange your furniture. Your couch doesn't have to be pushed against a wall, unless you have the tiniest of tiny apartments. In which case, there are other ways to change it up. Diy For Renters Diy Ideas For Renters Renters Diy Projects DIY Projects Apartment Diy Ideas
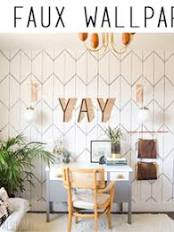
Pantone's 2017 Color of the Year Simply soothing for your future adventurer. Make a statement with this giant Slytherin Serpent! Mix up several of our Jungle Murals. Perfectly Paisley - choose your own colors! With our easy Paint by Number wall murals, simply tape, trace and paint to create whimsical or stylish, hand-painted DIY wall murals for kids or any room in your house. We provide even the most "artistically challenged" with an easy way to paint nursery murals for the perfect DIY nursery decor! Make it your own; create custom kids room wall decor by changing the colors, reversing the design, repeating parts of the mural and much more. Get started by viewing our Collections and Murals completed by customers! View all Collections → Dinosaurs, Dragons & Castles Princess, Castles & Unicorns Silhouettes & 1-3 Colors Sun, Surf & Sea LifeEveryone loves a good accent wall amiright? But here is the deal. Painters tape and stencils can only take you so far.

They leave a huge margin for improvement. The tool of a lifetime? How excited would you be if you could have the look of custom designed wallpaper for less than $10? That is EXACTLY what this project is all about. Here is a fun little video that we shot during the whirlwind makeover: I first discovered this little nugget of love while I was decorating my living room. It was life changing. I have been itching to do another one ever since and Alicia’s office was the perfect spot. I needed something quick and easy that had an awesome impact. 3 cheers for paint pens! If you are new to this project you will want to listen to this next sentence very carefully. DO NOT use a regular Sharpie. You will curse my great great grandchildren if you do. You want an entirely different maker called a Paint Pen. Paint pens are your friends. Doing this project again taught me a few new things that I am really excited to pass along! In my first post I said that you should only use water based paint pens, and that was what I totally set out to buy…until I couldn’t find any black water based paint pens.

So I thought “Self, lets just try it with the oil based pens…in an inconspicuous area of course.” Much to my joy it worked just as well as the water based pens AND you can totally paint over them (which I will show you in a minute!) Start by finding the center of your wall, using a straight edge (I prefer a clear plastic cutting ruler, it wins every day of the week) draw a straight vertical line. Math and crunching numbers is my least favorite pastime. So I used a 6 1/2” fabric ruler for all of it. Pretty please use a level while you are doing this project! Mark all of your vertical lines. Once you have your vertical lines drawn comes the really fun part. Mark every other line at the ceiling. This is going to be where the points of your pattern reach. Then place your ruler along the ceiling and on the opposite side of your ruler mark all of the lines that you skipped. That will leave you with a 6 1/2” space between marks. Once you have your entire row connected, line your ruler up at the lowest point and mark 6 1/2” down on the same line.

If you do it on the other lines you will end up with chevrons. Then line your ruler up on those marks and mark on the opposite side of the ruler on the skipped lines. To add the second line, mark 1” down from the low point and connect it to the high points. And because I never want you guys to think that it is always smooth sailing I thought it would be fun to share the entire process with you. After I had drawn all of my vertical lines, I started making my points. Instead of spacing them 6 1/2” apart they were only 4”. I wasn’t loving it from the beginning, but sometimes you have to see how it is actually going to look before you give up on the idea. Can you see how much more shallow the angles are? It just wasn’t my favorite. So I painted over them and started again. When you DIY there is always trial and error. How sad would I have been if I had just continued with the first design knowing that every time I looked at it I didn’t love it?