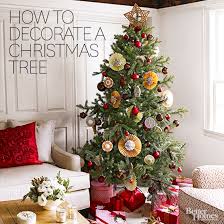
christmas tree decoration techniques

Local NewsLarger / SmallerNight Mode We all have a method: What's the best technique for decorating Christmas Trees?Decor Christmas New Year SChristmas Holiday TreesUpside Down Christmas TreesIdeas For ChristmasXmas TreesHoliday DecorChristmas CraftsHoliday IdeasHoliday UpsideForwardAn upside down Christmas tree. This would be cute to do in a corner on the wall :)Criss cross ribbon Christmas trees are not only beautiful, but very elegant. The ribbon adds design, texture, and color to any tree, regardless of the theme. The criss-crossed ribbon creates a very full and densely decorated appearance for a lavish, designer look. This idea works well with both expensive and inexpensive trees. The look works wonders on cheaper trees with a low tip count since the eyes are drawn to the decorations and ribbon, so the bare spots in the tree are not as noticeable. Since this technique is fairly new, it offers a unique approach for any decorator looking to create a beautiful and elegant looking tree.
Materials NeededThis look is very simple. All you need is: A roll of wired ribbon Craft wire or bread tie You can use any color, style, or patterned ribbon as long as it is wired ribbon. I would suggest that you use ribbon that is 2-3 inches wide because it is easier to work with and it won't look like you went overboard. Depending on the size of your tree, you will need 6 to 8 pieces of ribbon cut about twice the length of your tree. For example, if you have a 6 foot tree, you will want to cut 6 pieces of ribbon 12 feet long. If you have a slender tree, then 6 pieces will be plenty. If you have a very big Christmas tree that is very full and wide, you will want to do 8 pieces. Extremely large trees over 8 feet high and 3 feet wide will probably need 10 to 12 pieces of ribbon. If you don't get it right at first, don't worry. You can easily add or take away ribbon as needed when you get to the first step. How Much Ribbon Do You Need for Your Tree?
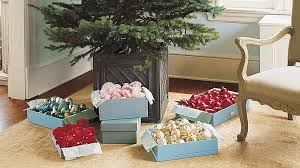
How Do You Decorate Your Christmas Tree? My tree is always a specific theme or color scheme. Somewhat of a theme but I always put the special ornaments on whether they match or not. My theme is whatever I have to use... I don't decorate a tree. 1. Prepare Your Ribbons by Securing Them at One End
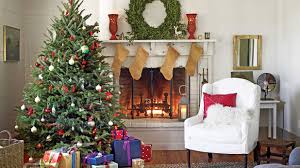
christmas tree decorating ideas gold and red After cutting the ribbon into individual lengths, gather them and make sure that any patterns or designs are all going in the same direction.
party decorations ideas for baby shower Once you have them in order, secure them using a rubber band, bread tie, or other method to keep them held together tightly.
metal art wall decor sale
Leave 2 to 3 inches so that you can secure it to the tree. 2. Drape and Secure Your Ribbon to Your Tree After securing the ends of the ribbon, it's time to drape them over the tree. Place the secured end on top of the tree and drape the ribbons evenly around it. Pull your ribbons straight and then secure the top to the tree by pinning, using wire or tucking it under the topper. I have a star topper that fits snugly on the tip of the tree so I hide the end of my ribbons under the base of the topper. 3. Make the First Cross Now that you have the ribbons evenly distributed around the tree, it's time to make the first criss cross. Starting anywhere on the tree, select two ribbons that are next to each other and cross them. You want to make your cross about 12 inches from the top of the tree. Twist these two pieces together twice by pinching them where they intersect, and twisting it tightly and in a fashion so that the metal wraps kind of snugly to hold the cross in place.
Continue doing this all the way around the tree until you have every ribbon paired up with the next and they are all crossed. (From here on, we will refer to the two pieces of ribbon crossing as "sections" and a round of sections will be referred to as "rows.") Once you have criss-crossed the ribbon on the first row, it will look weird. Don't worry — it will all come together shortly. It's normal for it to look too close together at the top and too wide between the sections. Just make sure your sections are even around the tree. If not, adjust and straighten them accordingly. Each section will be a guide for keeping your sections straight on each row. Close Up: How to Criss Cross Ribbon on the Tree Your twists should look something like this on each section of your criss-crossed ribbon Christmas tree. 4. The Next Step: Cross the Ribbons Again On the second row, you will criss cross ribbons again but with different ribbons. Start with a section and cross the left ribbon with the first ribbon of the section to the left, and the right ribbon with the first ribbon in the right section.
Criss cross the ribbons with their new mates and continue until the row is finished. Again, all the ribbons should be matched up on this row and there should not be any leftover ribbons that are not criss-crossed on any row. Once you have completed the second row, continue on to the next until you make it to the bottom of the tree. The sections of each row should cross in between the sections of the previous row, creating a webbed pattern. Try to keep the sections straight. The sections in the first, third and fifth row should line up evenly, while the second, fourth and sixth line up evenly, but are off-centered in the odd rows. Once you have criss-crossed the ribbon to the bottom of your Christmas tree, you are almost finished. You can either cut the excess ribbon off and tuck the end into the tree or make a final criss cross between the sections, cut off the ends and tuck it neatly along the bottom branches to create a solid ring around the bottom of the tree.