christmas cookie decorating ideas pictures

Pammy S CookiesPeeps CookiesClaus CookiesCookies FancyCupcakes TreatsChristmas Cookies Decorated IdeasDecorative Christmas CookiesCute Thanksgiving FoodDecorated Cookies ThanksgivingForwardThey may be Christmas cookies, but I think they're a great idea for tree ornaments!Want to make simple cookies truly showstopping for the holidays? Combine festive decorations with clever how-tos. Start with basic shapes, like a snowflake, tree, or snowman, and we’ll show you how to transform them into beautiful, edible works of art that are almost too pretty to eat. You don’t need to be a cake or pastry decorating expert, either; these techniques are all easy enough for beginners to master on their own at home. All you’ll need is a few cookie decorating supplies, a relatively steady hand, and a little imagination. We’ve even included a few how-to videos with step-by-step instructions, so you can get a first-hand tutorial of how to make each cookie. We’ve also thrown in some cookie ideas that allow you to get more creative on our own, like our simple gingerbread men and lollipop cookies.
You can assemble your favorite edible decorations and icings and let your inner artist come out. (They’re great projects for kids, too.) And just in case you’re short on time, there’s one cookie decorating idea just for you—our super-easy Chocolate-Peppermint Wafers. There’s no piping or sprinkles involved, just melted chocolate and crushed peppermint candies. So choose a cookie design, and let the fun begin!Decorated Christmas CookiesChristmas TreatsChristmas BakingHoliday BakingDecorating Christmas Sugar CookiesRoyal Icing Christmas Cookies IdeasChristmas Cookies SimpleHow To Decorate Christmas CookiesChristmas Sugar Cookies DecoratedForwardThe secret to perfectly decorated Christmas cookies? See how to glaze yours in a few simple steps.Yes, it’s already December. No, you have not entirely missed the cookie decorating train. Stop moping like these Melted Snowmen Cookies……and soon you’ll have a collection like this!Recipe: The Best Rolled Sugar CookiesRecipe: Frosted Molasses Ginger Sandwich CookiesRecipe: Old Fashioned Butter Cookies With Butter FrostingRecipe: Delilah’s Frosted Cut-Out Sugar CookiesRecipe: The Best Rolled Sugar CookiesRecipe: Eileen’s Spicy Gingerbread MenNow that you’re full of ideas, bake up a batch of cookies to use as your blank canvases.
You’re going to need some frosting and icing, aren’t you? Whip some up, then get started with basic cookie-decorating tips. Next, host a cookie decorating party and let your friends in on the fun.20+ Menu Ideas for Christmas Brunch Create a dazzling arrangement of cookies to savor and share this holiday season.
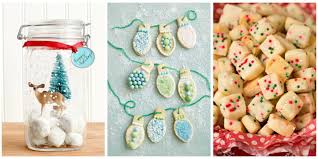
christmas tree decorations for runners Christmas Light Sugar CookiesChristmas Light Sugar CookiesAn assortment of crushed starlight mints, rock candy, dragees, M&M's, and string licorice comes together for some beautiful bulbs.
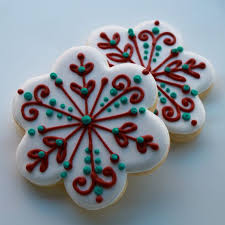
decorating a christmas tree historyVarying amounts of texture add even more interest.
wedding decoration rentals florida
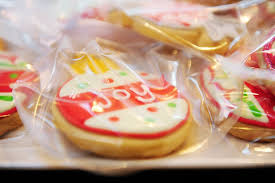
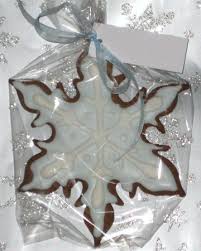
Wrap cookies in parchment, then secure with ribbon and tuck inside box. 10 Winter Sangrias Your Christmas Party NeedsThis weekend, four winners of the Holiday Baking Weekend Giveaway (and their guests) assembled at the Lodge for a weekend of rest, relaxation and…holiday baking! I decided to focus in on decorated sugar cookies, since learning those skills can open up a whole world of cookie fun around the holidays, but since I’m much better at haphazardly slopping savory ingredients into an iron skillet than I am at executing precise, meticulous cookie decorating techniques, I knew I’d want to bring in reinforcements. One day a month or so ago, I went to Twitter and asked for the names of favorite cookie decorating foodbloggers. There was a handful of bloggers whose names were mentioned over and over. I am Baker, for example. Her cookies are absolutely lovely. So are One Tough Cookie‘s. Amazing. One of the most enthusiastically recommended cookie experts was the lovely Bridget at Bake at 350.

I’d met Bridget briefly before, but wasn’t sure if she’d be game for taking a weekend out of her December and coming up to Oklahoma to teach a cookie decorating class. But I did know I was willing to find out. I emailed Bridget the same day…and she graciously accepted the invitation. And if that weren’t enough, Bridget took care of rounding up all the necessary supplies to teach the class…and send everyone home with what they’d need to decorate cookies themselves. When the box arrived at my house, I just about died. The stuff was just lovely. My homegirl Bakerella would have fainted. I adore the colors. Aside from all the sprinkles and glitters, there was all the gel coloring needed to make whatever color of icing anyone would ever want. I loved the glitter dust. And squirt bottles galore. I’ll show you why we needed them in a minute. (Sweet Baking Supply is the source. So here’s what happened: Bridget arrived. Then I ushered Bridget to the mixer and said something along the lines of “Take it away, Bridge!”
I like to show my guests a good time. I’d had a bunch of plain cookies made up for Bridget ahead of time (recipe link below) so she could focus primarily on the icing/decorating process during the class. Bridget uses two thicknesses of the same Royal Icing for her cookies (one thick, one thin); it begins with storebought meringue powder. Benefits of meringue powder (as opposed to fresh egg whites): 1. You don’t have to worry about the raw egg factor. I don’t get concerned about raw eggs for myself, but if I’m going to serve others (or, in this case, give cookies to others) meringue powder is a better bet. 2. You’ll get a more consistent result. With meringue powder, you’re not having to battle the temperature of the eggs, etc. So you’ll be able to get (generally) the same basic result each time you make the icing. To make the icing, you add the meringue powder to the bowl of an electric mixer fitted with the paddle attachment. Then you add water…
And mix it a bit until combined. Next, add in sifted powdered sugar. Here’s where Bridget asked me for a sifter and I handed her this fine mesh strainer, which I use for a sifter. She was very nice and didn’t talk about how unwieldy and awkward it was. I was very nice and sat there and ate undecorated cookies. It’s a problem I have. That, and inadequate kitchen tools. After you add the powdered sugar, you add a little corn syrup, then turn on the mixer and let it go. You don’t let it go for one minute. You don’t let it go for two minutes. You actually let the mixer go for a good five to ten minutes—more if needed. You want to let it beat until stiff peaks form. This, for instance, is not stiff enough. If you hold the paddle upside down and the icing moves or flops backward, it isn’t stiff enough.THIS is stiff enough. How gorgeous is this? The meringue powder makes it so glossy and nice. This is the icing Bridget uses to outline and define the sections of a cookie.
We had plenty of disposable pastry bags on hand, and lots of decorative tips. And lots of royal icing, colored various shades of holiday colors. To color the icing, Bridget uses Americolor gel. Other brands, Bridget warns, can make the icing taste a little funky. Just add a little icing into a bowl and drop in some of the gel coloring. Then stir it around, adding more color to the icing to get it to the depth you want. Bridget colored some icing green, then spooned it into a bag. She recommends filling it less than halfway full, then attaching a twist tie here… And here (up toward the top) if you want to walk away from it and come back later. Next up, now that the outline was completed, Bridget mixed up some flood icing. Flood icing is used to fill in the outlined areas of a cookie. It moves a little more freely and easily and can be used to create some really wonderful effects (more in a minute). All you have to do to make the flood icing is plop some regular royal icing into a bowl and add water in teeny tiny increments, stirring well after each addition.

This (above) is way, way too thick. The rule of thumb Bridget uses after mixing in each addition of water (and the additions are half a teaspoon at a time) is to raise up a ribbon of icing and drag it back and forth across the surface. If the ribbon sinks down into the rest of the icing within a count of “one thousand one, one thousand two,” it’s ready. This (above) is still not ready. A note about thinning the royal icing to make flood icing: there are no shortcuts, and this can not be sped along. You literally should only add water 1/2 to 1 teaspoon at a time (adding less and less each time), stirring after each addition, until the icing reached the proper consistency. As I watched this portion of Bridget’s demonstration, I commented that because I am impatient in the kitchen, I would be tempted to just slosh in a bunch of water and stir it around. But Bridget warned that doing so can really compromise the integrity of the flood icing. Next up, the flood icing goes into a squirt bottle…

And you just fill in the spaces. Use a toothpick to carefully move the royal icing around and evenly distribute it. Note from Bridget: The icing should not be thin enough to ooze into place all by itself; if it’s thin enough to do this, it either won’t dry properly or will dry with unsightly pits.Who the heck needs that pressure? Meanwhile we mixed some red flood icing on the sidelines (I was very, very careful not to slosh…but it was difficult) and Bridget squeezed it into the middle section. And then…this lovely mint green color! This color was my favorite. And you can see (above) the difference between the original, thick royal icing and the thinner flood icing. The thick stuff wouldn’t be able to be poured. Now, here’s what happens when you put flood icing on flood icing… It creates a flat color-on-color effect. (Bridget calls these “flat dots.”) And I love the red/mint green combination. That’s the basic technique!

Outline with the thick royal icing, fill in with the thinner flood icing. Drop flood icing onto flood icing to create pretty flat effects. The world is your oyster. Bridget was great to encourage everyone to try it. She made her way around the island, lending her help and instruction for anyone who needed it. My girls were there with a couple of their friends. And the guests churned out some lovely cookies… The flat flood-on-flood designs are my favorite. Just use a toothpick to make swirls. Bridget brought some finished cookies along. These peppermint candy cookies will make your skirt fly up…in a major way. Here’s the tutorial on Bridget’s site that shows you how to make them: Here are the links to the recipes we used: Vanilla Almond Sugar Cookies – These are the cookies Bridget uses, and they are exceptionally delicious. You don’t have to chill the dough before rolling them out (a plus!) and they’re really tasty. Note that she rolls the cookies pretty darn thick—I’d guess hers push half an inch thick—and in my opinion, this is what makes Bridget’s cookies extra memorable.