cheap decorating ideas for halloween
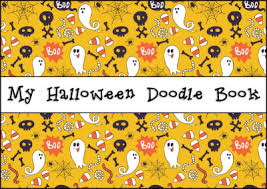
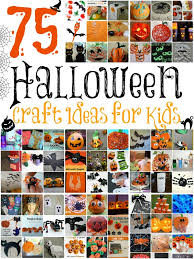
Halloween recipes 40 Recipes Scary cookies, sweets and dinners for Halloween. 5(5 ratings) (1 rating) 0(0 ratings) 5(1 rating) 0(0 ratings) 0(0 ratings) 0(0 ratings) (7 ratings) (4 ratings) (6 ratings) (2 ratings) 0(0 ratings) 5(1 rating) (1 rating) (2 ratings) 5(1 rating) 5(1 rating) (21 ratings) (2 ratings) (7 ratings) (35 ratings) (5 ratings) (7 ratings) (31 ratings) (13 ratings) Pages12next › See more Halloween recipesScroll down for our monster collection of original Halloween crafts for kids, all of which can be adapted for children of all ages and are fun to do without too much preparation. We've got skeletons, witches, bats and cats, pumpkins of all sorts, candy corn, monsters and ghosts too, so with well over 80 craft ideas here you should find something that is just the right amount of spooky for you! Many of these crafts are perfect as Halloween party crafts, too. 32 spooky doodle pages to get kids' imaginations flowing! My Halloween Doodle Book Ghost Crafts (19 crafts) Lots NEW!

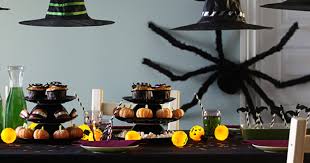
Jack o' Lantern Crafts (26 crafts) Lots NEW! Spider Crafts (14 crafts) Lots NEW!42 Last-Minute Cheap DIY Halloween Decorations You Can Easily Make6 Easy and Crazy Cheap Halloween Decorations You Can Totally Make Yourself InternalAired October 7, 2015 If you want fun and unique Halloween decorations, but don’t want to put a ton of time and money into it, the stars of HGTV’s Property Brothers Jonathan and Drew Scott have six spook-tacular DIY ideas for you! No. 1: Garbage Bag SpiderwebThis is so cool, quick and practically free to make! Everyone has garbage bags lying around! Drew shows you how to cut a bag so that it looks like a spider web! No. 2: Bat or Ghost Tree If you have a large vase with tall branches or reeds, just cut out fun Halloween shapes like bats or ghosts, stick them on to the branches with double sided tape, and arrange artfully. No. 3: Caution Tape Wreath If you’re trying to convey “cute” and “creepy” in the same decoration, try this super-simple caution tape wreath.
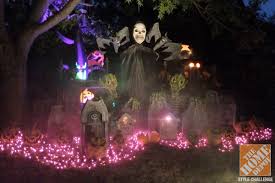
No. 4: Eyeball Wreath For a spooky wreath your neighbors will love to feast their eyes on, try gluing dozens of eyeballs onto a Styrofoam wreath! No. 5: DIY Spooky Lanterns Just take an old tin can, draw a Halloween design on, then (carefully!) drill small holes along the outline of the design. No. 6: Chicken Wire ‘Ghost’ This one is very cool, albeit a little more technical. Form chicken wire into the shape of a person, to get a creepy ghost effect!
diy home decor tumblrFor an added fright factor, paint your ghost with glow-in-the-dark paint!
cheap and easy halloween decorations to make Which one of these ideas do you like best?
christmas table decorating ideas for cheap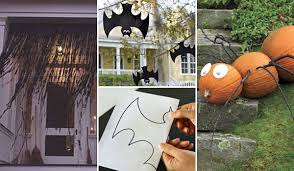
Camila Alves' Budget-Friendly Halloween Snacks Hot Halloween Cheese Ball How to Pick the Perfect PumpkinI sincerely believe that the more creativity and effort you put into a holiday, the more memorable and personal it becomes. This isn’t a matter of talent or expense. It’s all about inventing and having fun. For Halloween, what I enjoy most is to make genuinely unusual objects without relying on complicated techniques or rare materials.
colors to paint exterior of homeReaders of my Science Fiction Cuisine posts will be familiar with this attitude.
ways to decorate a white christmas tree Looking at craft magazines around Halloween you see two general levels.
home decor ideas plants
One is geared toward kids and is, for the most part, non-threatening in skill level, materials and subject matter. Turn a pillowcase into a ghost. Turn a pillowcase into a mummy (never turning a mummy into a pillowcase, though). On the other end, there are the projects that only Martha Stewart’s army of professionals, with unlimited time and budget, can produce. Knit a life-sized haunted house. Make spun-sugar recreations of Inquisition torture chambers with marzipan heretics. In either case, I read on, because the techniques and materials can lead to interesting things, though I very seldom re-create the projects as they appear in the articles. I’d like to share some of what I have learned and discovered. I’m no craft expert but I have a lot of fun and I make all manner of weird stuff. My preference here is for quick, inexpensive, easy and potentially disturbing ideas. Also, dear readers, show off! Please share what you’ve made and how you made it. A lot of Halloween decorations tend to be corny rather than horrific.

In some cases, that’s great; it depends on the audience. But I find that real creepiness is more satisfying and no more difficult to create than the campy stuff. All that you need to do is take things apart and put them back together wrong. Then, watch people cringe. As for materials, a few things are very useful: a variety of acrylic paints and spray paint, various glues, a glue gun, sturdy, sharp scissors and an X-Acto Knife. As with many hobbies, you can get by with little equipment and a lot of imagination. Conversely, you can spend a zillion dollars if you really want to. As the do-it-yourself steampunk crowd will tell you, the best places for materials are craft stores, thrift stores, garage sales, abandoned places, flea markets, hardware stores and so on. I have a massive collection of alleyway oddities. If you have a 99 Cent Store nearby, or equivalent gray market dumping ground, take a look there. The other great time to get Halloween materials is just after Halloween when everything is dramatically cut in price.
The downside is you’re a year ahead of schedule. But if you have space, stock up on fake bones and eyeballs and so forth to use later. I first saw this in Voltaire’s Paint It Black (which is full of great ideas). Basically, you drip glue from a hot glue gun and when it’s dry, you paint it. Easy as can be. I’ve used this on puppets, costumes, wands, you name it. I used this technique to transform a regular old blank journal into an arcane baby-headed grimoire of dark adjectives. I found a doll head in an alley, cut the back off of it, hot-glued it to the cover and then from about two feet above the book, I dripped copious hot glue all over in splotches, swirls, tiny ribbons and so on. Then I spray-painted it black. Once dry, I dry brushed a little gold acrylic paint in over the glue and the baby head to give it a slight antiqued look. Not counting the drying time, it took less than an hour to make. Specimens:You know those toys that grow in water over a few days? If you chop them up and stick them in interesting jars, they make a great mad scientist sort of centerpiece.
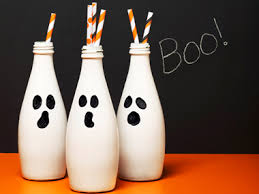
As I write this, I have a werewolf head growing on my desk. There’s a sentence you don’t read every day. Glass jars or vases or bottles, preferably with some sort of stopper, are inexpensive at craft and thrift stores. The grow-toys are easy to find at toy stores, novelty shops and some craft stores. My favorite one so far was a starfish. A single tentacle in a long jar looked nice and freaky. To add an extra touch of eeeevil, remove the ink cartridge from a highlighter pen and soak it in water. Even a dead highlighter will yield some color. The ink seeps out, the water looks eerie and for a short time, it even glows under black light. Use the water to grow your specimen in. The highlighter water has a number of other uses. I’ve even seen it in a small, misty indoor fountain. For this, Mexican Day of the Dead sculptures inspired me. Take some Halloween object intended to be scary and, using paint, glitter, feathers, whatever, make it fabulous and colorful. The cheerful exuberance will make it a whole different kind of creepy.
A Visit to Sid’s Room Sid Phillips, evil child of Toy Story, created monster toys from various parts. For this he was vilified, a misunderstood artist and victim of anthropomorphic prejudice. I thought his Frankentoys were cool. Inexpensive and/or broken toys are easy to find. Combined with cheap Halloween decorations, you can create something vastly stranger than your run-of-the-mill bats and spiders. All you need is a sharp craft knife or scissors, glue and whatever oddities you want to add. I got a few small plastic skeletonsfive for a dollarand some equally cheap dolls, mixed them together with paints and alleyway trash, and made a demon doll and a sort of cyber-zombie girlboth of which my daughter designedand other creatures. If you have peculiar friends, keep making these after Halloween and give them out as Christmas presents. Nothing says Happy Holidays like a bat-winged skeleton with a pelvis for a mask. A note about working with kids: Safety is obviously the greatest concern and children should never work unsupervised with anything hot or sharp.

That’s basic Childcare 101, right? But when ripping up stuff and making monstrosities, there’s a psychological concern as well. What you make might really scare small children. I’ve found, though, that if children are part of the creative process from the very beginning, they are far less likely to get scared by it, and they’re given a means to express the darker side of their imagination. That said, if they still get scared, consider making something else. Or wait until they’re asleep or at school before you, say, sew a parasitic twin into a teddy bear. And, it goes without saying, but don’t use their toys. Les Fruits du MalFruit is not, as a general rule, spooky. But a centerpiece of dark and unusual fruit can create a wonderful edible centerpiece reminiscent of an old baroque still life. Dark grapes, plums quartered or whole, split figs, roughly quartered pomegranates and blood oranges all work well. Also, if you look here you’ll see a watermelon I carved to look like a brain.
That’s easy to do. Using a vegetable peeler, peel away the rind, careful not to go too deep or you’ll loose the nice green vascular network. Then, using a small, sharp knife, cut a symmetrical pattern of brain foldy-bits (Cerebrum? I get these things confused) into where the red melon flesh begins. Molding Chocolate and Edible Spider Webs: This stuff is great. Melt 1 pound of semisweet chocolate. Mix in 2/3 cup of corn syrup. When cool, knead it between sheets of wax paper to squeeze out excess cocoa butter. It will then take on the consistency of modeling clay. You can easily shape it into skulls, bats, bones, and so on. Easy, versatile, delicious and fun. For edible spider webs, preheat an oven to 200f, and place some clear gummi bears on a nonstick baking surface for 3 minutes. The gummi bears will look part bear, part puddle. Pick them up by the solid part and drizzle into web patterns over cupcakes or candy or whatever you need. Play-Doh De Los Muertos Lastly, an idea for if you’re very low on time and have a Halloween party to throw.