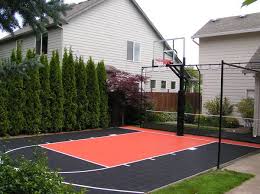
best paint for outdoor basketball court
Outdoor basketball courts weather a lot of wear and tear! Find one in your community that needs a little sprucing! Fresh paint can spark spirit and pride, and painting logos or mascots in center court encourages community identity! 9" roller, pad, and tray 4" roller, pad, and tray Concrete or asphalt primer Porch and floor paint 1 ½" painter's tape Sort all materials into piles by like items to ensure you have materials needed to complete project. Depending on the size of your basketball surface you may need to leave parts of the court off, make a half-court surface, or customize it. If you have enough room to work with, the diagram shown will tell you the official court size. Before priming, wash the entire area with a pressure washer. If you do not have access to a pressure washer, use a hose and a high-powered nozzle and sweep the area with a broom afterwards. Let the surface dry completely before you begin priming. Prime the entire area using a clear concrete primer and rollers with extension (optional, though recommended)

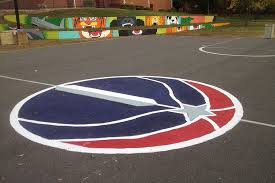
Additional notes about working with Concrete Primer: Wear appropriate eye, skin and apparel protection when applying primer. Completely strip all coatings prior to use. Do not over apply or allow product to puddle. Remove any puddles by spreading product to drier areas or by wiping up excess with a clean cloth. On vertical surfaces apply using an airless sprayer or brush. Initial foaming may be observed but will disappear upon drying. For touch-ups where surface coatings have failed, completely remove any loose or peeling paint by scraping, wire brushing or grinding. New concrete must cure for a minimum of 30 days prior to priming. Primer dries to the touch in 2 to 4 hours at 77°F and 50% humidity. Additional drying time is needed in cooler temperatures and higher humidity. If you are interested in painting a center court logo/mascot, make a stencil out of poster board or similar material. Trace the design onto the poster board and cut certain sections out for easiest use.

Another method for painting a logo/mascot is to use a grid system. With the image set behind or sketched onto a grid of squares on paper, you can create that same grid on the ground, using a tape measure and string line (spacing the squares evenly to mimic the grid on the paper). Then you can simply use the squares as a guide for sketching out the image, and then paint it after it has been sketched. Mix the non-skid additive into your paint. If painting a logo or mascot, use the stencil created during preparation steps, then paint with small brushes.
christmas tree decorating ideas and picturesFill in large areas then create outlines when the paint is dry.
living room decorating ideas shelves If needed, lay out the stencil for the Basketball Court Lines and secure with tape as necessary (instructions should accompany the stencil).
decorating a christmas tree top
Paint the lines and then fill in the areas using rollers and brushes. Put up the caution tape so that no one steps on the fresh paint, and touch up the area with a small brush as needed.Duracourt outdoor court coating is designed specifically for coating asphalt or concrete recreational surfaces. Duracourt is excellent for new or previously painted all-weather surfaces including tennis, basketball, volleyball, and other recreational court surfaces. The advantage of using Duracourt over other tennis court coatings is the simplicity of our system. There is only oneSome systems require up to seven different filler coats or cushion coats, which can add up to a big investment in labor and materials. One liberal coat of Duracourt is all you need for a beautiful, long wearing surface. The easy surface preparation also adds to the simplicity of using Duracourt coatings. Simply sweep the court, mask the boundary lines and you are ready to apply Duracourt.
courts will be ready for play in 24 hours! You also save money by using Duracourt coatings because it is a one coat product that requires no specialized labor. This is especially advantageous for municipalities, universities, schools, and country clubs who want to use their regular maintenance people for coating their courts. Duracourt provides a virtually maintenance free playing surface which results in long run economy for many years to come. Duracourt coatings are formulated from tough acrylic latex which is ideally suited for outdoor play. and breathes to accommodate changing temperature and weather conditions - which means there is no peeling or cracking of New (1) from $203.99 Easy Court Premium Basketball Court Marking Stencil Kit No matter how great your hoop is, it just doesnt feel like a basketball court until you have the lines. The Easy Court Premium Basketball Court Marking Stencil Kit contains everything you need to set up a regulation key and free throw line, and a high school regulation three point line without measuring and without any messy over spray.ft The reusable cardboard stencil lays out in just minutes, and the included basketball stencil paint sprays easily and cleanly, for crisp lines every time.

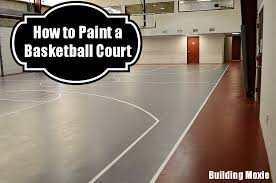
The stencil has dashed lines (the dashes are less than a quarter of an inch) in order to help hold it together so that it is reusable however, solid lines can be created by filling in the dashes. Shipping Information: View shipping rates and policies Amazon Best Sellers Rank: #582,303 in Sports & Outdoors (See Top 100 in Sports & Outdoors) in Sports & Outdoors > Sports & Fitness > Team Sports > Basketball > Court Equipment > Hardware & Accessories in Sports & Outdoors > Sports & Fitness > Accessories > Field, Court & Rink Equipment in Toys & Games > Sports & Outdoor Play > Sports 14 star100%See all verified purchase reviewsTop Customer ReviewsWorks great but requires 2+ peopleThose that have been following our Facebook page know that one big project I’ve had hanging over my head was painting a basketball court, the floor itself, at a local church. It was part of a deal that the athletic association at my daughters’ (plural) school made with the church in trade for free court time.

Our school has a pretty robust basketball program (for a primary/middle school) – one to be proud of and one that makes it sometimes difficult to get onto the court at our own school. How’d I get involved in this? Well, my friend, let’s call him – Randy, prez of the association got wind that, well – I do something with construction. He recruited me back in June and it was my job to specify the products and actually produce the materials we would use, plus determine how, roughly, we would go about doing the floor. The funnest part – the budget for this particular project – $0. Well, to be more accurate, the actual cost and the amount of equivalent gym time we had received totaled about $1000. In other words, our goal was to paint the floor for, well, less. This floor, concrete, had been “painted” before, five years earlier, and it, the coating, had pretty much warn away. So my first task was to determine what could go over a previously painted floor and hold up to sports-type foot traffic.

Early research, and questions I asked at my local pool, lead me to what I’ll call “tennis court paint” and other trowel-on type epoxies. From that, epoxies, too, that you would see on a garage floor or maybe in a pool-side-type application. Many are reasonably priced and are available now in a one-part configuration. It should also be pointed out that this same space not only acts as a basketball court and as an indoor futsal court, but also as an overflow for a day care operation also housed at the church. The presence of kids in general of course forced the consideration of VOC content in any of the products we would select. I got on the horn with the support lines for the products I was looking at. In every case, I heard, “How are you going to prep the floor?” We ruled out pretty early the idea of stripping all the existing paint from the floor. In all cases, it was suggested that if we did not intend to fully strip the floor any added cost spent on a premium coating would just be wasted expense.
Other considerations included not only the size of the floor, around 4200sf, but also both the amount of time we would have to do it and how many bodies we’d actually have working at a time. This project was originally scheduled for the weekend before Thanksgiving, but a surprise last minute rental of the space forced us to postpone. … until, well, this past weekend and we leveraged Martin Luther King, Jr’s birthday Monday. Six of us all together worked at varying intervals. While some suggested both sweeping and mopping the floor, I added that we could pressure wash. These ideas though were ultimately nixed, because of the potential added time to dry. Even with the added Monday, we’d only have access to the floor Saturday 2pm through that Monday. Prep would include spot scraping of loose patches, push-broom sweeping, dust-broom sweeping (a 6 foot janitorial type model was left for us and came in very handy). We finished by wrangling bits of remaining dust off the floor with a herd of leaf blowers.

When floor was initially “painted,” and I’ll stop here to point out that we were never sure. To me the consistent wear pattern led me to believe that the floor could have actually been stained – though I would have expected to have seen more and deeper … color saturation. Rumor had it, the court’s lines were originally painted on using a template specifically designed for basketball court lines. We could neither locate the original template nor did even look for a new one. … it was decided pretty early on that we could just use the existing lines, masking directly over them prior to applying any base coat. For this, and via an introduction made by Roeshel, the DIY Show Off, I approached Frog Tape… my favorite of all masking tape brands. They donated both their classic green Multi Surface tape, which we used for taping over the existing lines, as well as some of their yellow Delicate Surface tape, which we later used in masking off for new lines. I have always loved Frog Tape’s edge technology – Paint Block for crisp lines but I think the others also were super impressed.

While the 1.88-inch tape worked excellently for taping directly over the existing two-inch lines, I found that the one-inch tape (.94 inch actual) worked much better with masking the arches at both the top of the key and at the three-point line. Once taped and yes, the taping was by far the most labor-intensive, time-consuming portion of this project, it was well worth the time, and the time saved in not having to layout these lines by hand. For the base coat, and working very closely with the manager at my local Glidden Pro Store, I selected their Concrete Coatings, yes – that’s what it’s called, for the base – a stain. As it was presented to me, I would be thoroughly impressed by this product’s ability to cover. As a matter of note, it would have been a very good choice (in the beginning) working with an un-coated surface, but still it would also adhere decently over an already painted surface. For estimating, I calculated using a number that split both the theoretical and actual coverage, found on the data sheet (350sf per gallon yielded eight gallons for a gray court surface and four gallons of red for the area outside the court).
Because the floor itself contained some irregularity, and partially due to a rubber tiled floor that was originally laid over it, I selected semi-rough rollers with a ½” nap for our method of application. While I considered purchasing 18” roller set-ups, the added cost I felt was not warranted as surely members of our team had standard 9” roller set-ups already in their possession. In the end, I supplied all the roller frames, roller pans, etc. we would need. I selected Glidden’s Ulra Fab – their mid-range roller cover made for them by Wooster. On applying the stain, we worked using extension poles. I won’t say there was any science to the way we worked but it was more … “those guys are working over there, so we should work over here.” In the end, it appeared we worked in quadrants, and believe it or not – from the center, always mindful of what was wet and painting ourselves out the door. In the end, and again considering the tight schedule, we did one thorough coat (which gave us decent … hide) and only touched up the blatant misses for a part of a second coat.

The end result was lots of excess stain. We used appropriately 4 ¼ gallons of gray to cover approximately 2800sf and 2 ¼ gallons of red (which did get pretty close to a full second coat) to cover approximately 1400sf. We removed the tape we had laid before applying the base coat. Again we found a little good fortune, here. I reached out to a few paint manufacturers, including Glidden, and was overjoyed when Rust-Oleum agreed to lend their support. Now, I know what you might think – Rust-Oleum = spray paint. And I actually did think about spray painting the lines, but you may not know that Rust-Oleum has an entire line of industrial paints. A call again into their support line yielded – Concrete Saver, a urethane-based floor paint, which … supposedly does excellently with lines on concrete. In the end, we chose to roll-on. Three-inch touch-up rollers purchased at the HD worked great. We selected white, and as you’ll see, it really really made the floor pop. But before we got to this and as I mentioned above, we used Frog Tape‘s Delicate Surface tape, designed for going over freshly painted surfaces.

By specification, a minimum of 24-hour dry time, but we unfortunately did not even have that luxury. (If you are curious, I figure we used about 300 yards of tape, the green in masking – double that for masking off both sides for the new lines.) Once masked, five of us working, we applied the Concrete Saver in three quick coats. Once the lines were tacky, we removed our masking tape being very conscious of “tear out” and possible dipping of the waste tape onto our newly painted lines. I wish I could say that once we pulled our tape, we were done. Of course our lines were razor-blade sharp, but we did unfortunately see some “peel-up” from the base coat. (This, I think, was largely due to the dips and gullies in the surface – though again, another credit to Frog Tape.) Working with touch-up pads we went around the room. In the end, this only added about a ½ an hour to the project. Ideally the entire floor should not see heavy use, i.e. be played on, for at least 72 hours.

Fortunately for us, it has snowed and school has been cancelled now for two days straight. The total expense on this project sits at around $440 and the church has plenty of left over stain for touch ups or even a complete re-coat … one day. While we had the opportunity to mask the center circle before applying the base, we opted instead not to, thinking that we could use a nail driven in at the center and running a string or wire around it, freehanding with a two-inch roller or pad. In the end, the powers that be, the group collectively decided it would be best to mask off anyway for that sweet crisp line. Because we decided initially only to mask the “4 corners” of the circle, we had to roll back and improvise using a 2×4, a drill with a masonry bit, two pencils spaced two inches apart and a concrete nail driven in, as initially planned, at the center of the circle. Three members of our team operated this home-made compass.Thanks for reading and another quick thanks out to Frog Tape and Rust-Oleum for their support.