best outdoor paint for windows

Repainting wood trim around windows is no small task, but fortunately it’s one that you can easily do yourself, especially if you have a single-story home or a great ladder. Peeling, cracking paint is an unsightly feature and leaves your windows prone to damage and reduces your overall curb appeal. But, when it’s properly done, you can go many years without having to repeat the process. Pressure wash or use a spray bottle of multi-surface cleaner, a rag and old-fashioned elbow grease to clean dirt from the surface of the window and the surrounding trim. Removing built-up dirt helps you to see the condition of the window trim before you begin scraping paint. Also, the new paint will adhere better on a clean surface. Removing peeling paint is critical to ensuring that the new coat of paint goes on well. Work diligently with a paint scraper or putty knife to scrape free all the loose paint. If you have an older home, there’s a chance of lead paint being on the windows, test for it.

In spots where glazing is missing, the seal around the glass pane will likely be loose.
bedroom theme ideas for couplesLikewise, if caulking appears shriveled or cracked, wind and water can seep through and cause damage to the window’s interior. Sand the scraped window surface. You want to create a very smooth transition between the remaining paint on the window trim and the areas that were scraped down to bare wood. Sanding the surface of the existing paint will also help the new primer and paint adhere better. Dust the windows when you are done sanding. Most caulk is formulated to completely dry within a few hours, but re-glazing windows requires a longer dry time and extends the project timeline from a few days, to a few weeks. Tape off the glass before priming and painting, but if you’re using a latex-based paint and you have a steady hand, you can probably do without the tape.

Just make sure to have a damp rag on hand to wipe off primer that accidently lands on the glass. Or you can wait until the job is done then scrape it off using a razor blade. Do your best to be neat when working along the edges of the glass. Apply a coat of primer to the entire surface of the window trim. Allow it to completely dry. Follow up with a coat of exterior paint. If you’re changing the paint color of your trim in the process, you may find that it will require an extra coat of paint to achieve adequate coverage. There will be paint left behind on the surface of the glass (expect it, no matter how hard you try to be neat). The easiest way to remove this paint is by wielding a sharp razor blade. Use the tip of the blade to slice through the paint along the edge of the trim, and then hold it at an angle and use the wide edge of the blade to peel it off the glass from beneath. It will flake away and can be wiped clean. Run a rag dampened by multi-surface cleaner over the windows one last time to remove fingerprints and dirt.
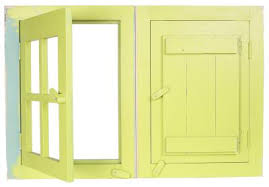
Your freshly painted windows should hold up well for many, many years.Bring a pop of fresh color to your home’s exterior while instantly boosting curb appeal Putting a fresh coat of paint on your exterior windows in a simple way to make an instant improvement to your curb appeal. This guide will take you through the process of stripping old paint and repainting exterior shutters and trim. Tip: When painting window frames, look for a quality exterior trim paint. Trim paint is specially formulated to be tough and long-lasting in any weather. WHAT YOU NEED FOR THIS PROJECT • Scrub area with TSP cleaning solution and thoroughly rinse with clean water. • Scrape off loose paint and window putty from around the edge of the window and brush clean. • Brush the wood you exposed with linseed oil to help the new putty stick. • Roll new putty into a thin tube shape and press it into the bare spots. • Pull a putty knife along it to create a flat sloping surface.

Slide a damp finger along the putty in the other direction to remove any small imperfections. • Once new putty is applied, open the window and pull the top down until it’s about 3 inches from the sill. • Push the bottom sash up until it's about 3 inches from the top of the window frame. • Allow to dry for as long as indicated on manufacturer’s instructions. Tip: Don't worry about getting some paint on the glass. Just wait until it's dry, then use a single-edge razor blade to scrape off the excess. • Prime any bare wood. • Start with the pieces in the window grid (called muntins) if there are any. • Then paint the horizontal pieces, followed by the vertical pieces. Following this pattern will give you a nice, neat results. Any brushstrokes running across the grain are subsequently covered by strokes running with the grain. • Return the sashes to their normal position and paint what you were unable to reach earlier. • Once painted, open the window slightly, leaving about a 1-inch gap at the top and bottom.