best exterior woodwork paint

Start any exterior paint job by cleaning, scraping, and repairing the surface. Take notice of how the paint has weathered and any surface problems. Chalking, blisters, peeling, cracking, and stains must be dealt with before applying a new coat. Unless the cause is discovered and corrected, the problem will reappear and ruin your fresh paint job. Temperature Blisters Paint bubbles can show up pretty quickly, from within a few hours to a few days after application. The blisters are only in the top coat of paint and appear most often in oil-based paint. A quick rise in temperature, like sunlight shining directly on the newly painted wood, causes a thin skin to form on the outer surface of the paint. The skin traps inner wet paint that produces vapor when it heats up. The vapor expands and causes the paint to blister from underneath. To repair blisters, scrape them off, smooth the edges, and repaint, being sure to avoid direct sunlight while the coat dries. Experts suggest establishing a painting order that follows the sun around the project.

Thick coats and dark colors are more likely to blister than light colors and thinner paint. Moisture Blisters and Peeling Moisture causes problems for paint. Rain, dew, ice, and snow on the outside or vapor and moisture buildup from the inside can cause problems with exterior paint. When moisture penetrates the paint, blisters can form and paint can peel. Moisture blisters, unlike temperature blisters, go through all coats of paint down to the wood. To stop moisture blisters, you must locate the source of the moisture and repair it. Improper construction techniques and lack of flashing can cause outside water to pool at joints, on window sills, frames, or on the end grain of the wood. Water vapor moving through walls to the outside paint can come from plumbing leaks, sink or tub overflows, cooking, or using a humidifier. The vapor moves through exterior walls if there is not a vapor barrier or if the barrier is incorrectly installed. Look for this deterioration particularly outside bathrooms, laundry rooms, kitchens, and the gable ends of the attic.
Intercoat Peeling Another type of peeling occurs when a newer coat of paint separates from the coat underneath. An inadequately prepared or dirty surface is one cause for a weak bond. Another is that the two paint layers are incompatible. For example, an oil-based paint may have been applied over a latex-based paint. They are incompatible and can peel away from one another. Peeling can also occur when too much time has elapsed between applications of the primer coat and the top coat. If more than two weeks separates the primer application and the paint coat, the primer’s surface can begin to break down and prevent proper bonding with the paint. To correct the problem, you must remove the paint and properly clean the surface. Cross-Grain Cracking or Crazing Too many layers of paint or one layer that is too thick can result in an interconnected, uneven pattern of cracks. The thick paint is unable to expand and contract with the wood, so breaks result, starting in the outer layers.

Chalking Some exterior paint has a powdery coating. Chalking comes from the disintegration of the paint resin due to exposure to the sun’s ultraviolet rays.
beach room decor for saleThis gradual deterioration is how paint is supposed to age.
decorating wedding venue ideasToo much, however, can cause discoloration of other painted areas below as rain washes off the chalk. It also signals that the paint is rapidly deteriorating. Chalking was more of a problem with older paints that contained excessive pigment for the amount of binder, but other triggers include the failure to properly prime and seal exterior wood, spreading the paint too thinly, or thinning the paint too much. To correct excessive chalking, the surface must be cleaned and repainted. Staining A stain is typically caused by moisture.

The most common source is rusting metal nails or anchoring devices in the wood. The second cause is a chemical reaction between moisture and wood, such as red cedar, which results in color buildup on the surface. Rusty nails can be hand sanded and coated with a rust inhibitor and finish coat. Unless the wood is too fragile or the exposure of the nail head is related to the original construction system, it’s best for nail heads to be countersunk, primed, and filled before painting. Stains from wood extracts need to be cleaned, rinsed, dried, and primed with a stain-blocking primer before applying the finish coat. Check with a knowledgeable local paint retailer for the best cleaning mixture.Your nearest store doesn't match your preferred store. Do you want to change the nearest store as your preferred store? Click "YES" to clear all the customer data, cart contents and start new shopping session. Your current shopping session will get automatically reset in seconds. If you are still active user then please click "NO"
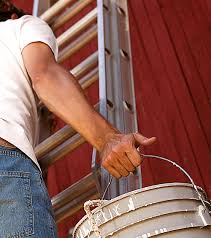
Changing your store affects your localized pricing. This includes the price of items you already have in your shopping cart. Are you sure you want to change your store? Your nearest store doesn't match your preferred store. Please enter your ZIP code to view local pricing Why is this information important? To Check In-Store Availability Not in the United States? For details,please view our Privacy Policy Painting Exteriors and Equipment Sure, a little paint can make a fence, outbuilding, or tractor look shiny and new, but more importantly, it can protect your property and equipment, saving you money, time, and aggravation over the years. A layer of paint is what protects your buildings from the summer sun's hot rays, from winter's cold and ice, and from water that can cause mildew and moisture, so it shouldn't be taken lightly. It's important to use the right combination of prep, primers, and paints to achieve the best protection for your home, barn, and sheds.

Farm equipment is a huge investment, so it's crucial to keep rust from eating through it. Rust forms when metal mixes with water and oxygen, deteriorating the metal. But you can prevent rust by regularly painting your equipment and tools to keep the metal from being exposed. By investing in a little paint, you'll keep your equipment and tools in good repair for very little cost. Use this guide to help you choose the right paint and preparation. Defining your Painting Project The first step in painting is to define the nature and scope of your project. What are you painting? The answer determines the kind of paint, how much, and the best way to apply it. What surfaces are you painting? Be specific, so you don't overlook other items you will need. A wooden barn, for example, may also have a concrete block foundation, or a metal roof or hinges. How do you want to paint? Is your priority a long-lasting paint job? Or do you want to get the job done as quickly as possible?
What gloss or finish do you want? How much time do you want to invest? How are you going to clean up? Cleaning up spatters and spills and maintaining your equipment is an important part of your project. Choosing the Right Paint Paint is a mixture of dry coloring matter - called pigment - and a solvent, which usually is either oil or water. Oil paints are only one kind of oil-based paint. They create a tough skin bonded to the applied surface. Enamel paint, which is oil-based, produces a hard, glossy, moisture-proof finish. Enamel hardener can be added to enamel paint to further increase hardness, gloss, and durability, and reduce drying time by 45 percent. Aluminum paint, which is oil-based, creates a reflective, weather-resistant coating using aluminum flakes. Latex paints, which are water-based, dry quickly and can be applied directly to previously painted surfaces. Other surfaces, such as new wood, require primer. Primers are used to provide an even finish.
They also prevent stains or rust by sealing porous surface materials and improving the coating adhesion of paint to most surfaces. Using a primer also allows you to easily apply lighter-colored paint to a dark room because it masks the dark surface. The primer you need depends on the paint you'll be using. The paint you select will usually recommend a type of primer on the label. To get the best results from your paint job, the surface must be as clean and smooth as possible: Remove any rust or loose paint from metal surfaces by scraping or sanding. You may need to use an abrasive blaster if the surface is in very poor condition. Remove loose paint and dirt from wood surfaces by scraping, brushing, or sanding. Remove oil and grease with rags soaked in paint thinner for metal or with a detergent solution for wood. Allow the surface to dry thoroughly before applying primer or paint. To prevent moisture, caulk and seal wooden holes and joints. For barns, remove residues by power washing or by using a stiff brush with a mild detergent and water solution.

Sand glossy or protected areas - such as under eaves - to assure proper adhesion. Remove mildew with a bleach solution. Check that the paint is well mixed. If the paint is too thick, you may need to consult the paint label for thinning instructions. If there are flakes, lumps, or other impurities in the paint, use an extra bucket and strainer bags to strain the paint. If you have plenty of leftover paint to use for other projects, make sure you store it in a way that will preserve it. Store paint in a dry location away from heat or open flame. Do not allow paint to freeze. To avoid rust, do not store paint cans on cement floors. Replace the lid firmly. Oil-based paint and solvents - including mineral spirits - are considered hazardous waste. Check your local regulations to find out how to properly dispose of them. DO NOT throw liquid paint in the trash, take it to a landfill, pour it down a sink, or pour it on the ground. Doing so allows the hazardous chemicals to get into groundwater.